Do you have a WordPress membership site or users logging into your site? Can they access your WordPress dashboard even if you are not intending for them to? The good thing is that you can limit access to the WordPress admin dashboard.
There are a number of reasons why you might want to keep users off the WordPress dashboard. Whether you have a membership website on the front-end or simply need users to log in but not access the dashboard, you have a couple of ways to prevent users from accessing it.
In this guide we cover how to reduce or limit access in the WordPress admin back-end as well as preventing a logged in user from accessing the WordPress back-end at all.
There are three methods we will cover:
- the settings we already have available
- Writing our own simple code to prevent a user from accessing the back-end
- Using a plugin to achieve the same thing as the code.
Limiting Access by changing WordPress User Permissions
If you still want the logged in user to have access to the WordPress back-end but do not want to give them complete access then you need to utilize user roles.
User roles and permissions exist in WordPress to provide people who log into your site with varying levels of access.
There are six built in user roles for registered users on your site (listed below). These roles are given to manage who has access to writing and managing content, moderating comments, installing and configuring themes and plugins as well as adding and removing users on the site.
All of these actions are controlled by user roles.
Each role in this list can do everything the roles below it but not anything above it. In order of access, the roles are:
- Super Admin: Has the highest level of capabilities. This is a role given for administrators of a multi-site install. This role includes all of the privileges of the other roles below but also gives them privileges to manage sites and the settings involved with multi-site. This role is not available if your site isn’t a multi-site setup.
- Administrator: The Administrator has complete access to a single website. They can install and manage themes and plugins, manage users and provide maintenance and configure site settings.
- Editor: The editor role is perfect for being able to control all of your content. They can add, edit and remove all comments, categories, posts and pages and can do so for other peoples content as well.
- Author: They can only create and edit posts and upload media. The author role has less access than the editor.
- Contributor: The contributor role allows a user to only edit and remove their own posts. It is the last role that has edit access in WordPress.
- Subscriber: The subscriber role allows you to only read published content and edit your profile. This is a perfect role for when you have a membership site and only want them to be able to read the content when they log in because they do not have any other capabilities like editing or creating content on your site.
You can find out exactly what access each user role has in the Roles and capabilities Codex page.
Now that we have covered the different roles available in WordPress, it is important to know that you can assign a user any type of role on the website. Setting these user permissions is the simplest way to restrict users from doing things on the back-end of your site.
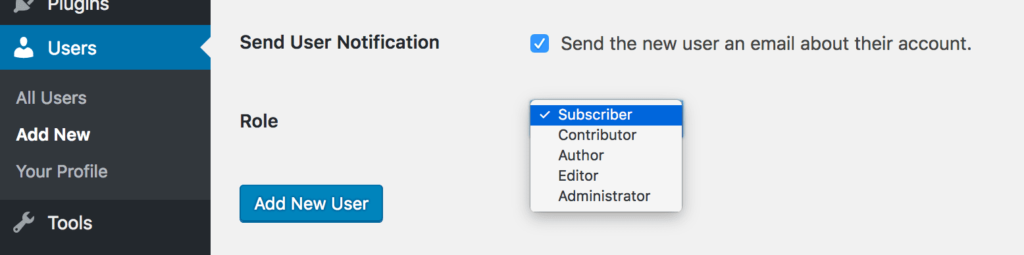
If you are after a simple way to limit what access the user has then you simply need to log in as an administrator and edit each users role in the Users sidebar menu.
Click the Update User button to save the changes.
If you want to set the default user role then you can in the WordPress general Settings.
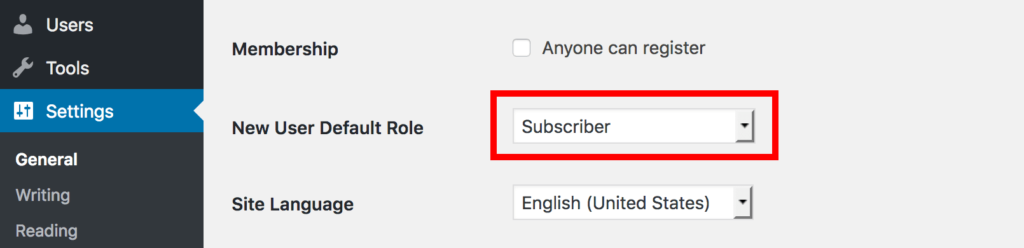
Set the New User Default Role to the role that you want to set and then save the changes. All future users that register onto your site will default to that role that you set. You can always change the role at a later point.
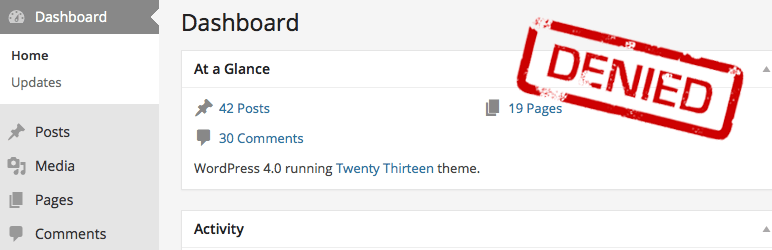
Disabling access to the WordPress Dashboard
Changing the user role may limit access to the WordPress dashboard but often you will want to completely disable access to the back-end of your site for certain users. This may be the case for when you have a membership style website where you only want the user to access the content on the front-end of the site.
Users sign up and then have access to the restricted content on the front-end of the site. They can manage their own profiles on the front-end so they will not need to access the back-end.
By default, WordPress allows users to access their profiles and the dashboard of their site so if you do not want people to access the back-end then you need to prevent them from doing so.
Depending on your skill or requirements, you can either install a plugin (below) to do this or add a tiny snippet of code (also below) to your themes functions.php file.
Code to prevent user from accessing WordPress back-end
The following code can be put in your child themes functions.php file to block non-administrators from accessing your websites back-end. Admins will still be allowed access but all other users will be redirected to the homepage.
[code type=”php”]// Block non-administrators from accessing the WordPress back-end
function web3_block_users_backend() {
if ( is_admin() && ! current_user_can( ‘administrator’ ) && ! wp_doing_ajax() ) {
wp_redirect( home_url() );
exit;
}
}
add_action( ‘init’, ‘web3_block_users_backend’ );[/code]
The above code has three conditional checks.
- is_admin checks to make sure this is only firing when the WordPress back-end is accessed.
- ! current_user_can( ‘administrator’ ) checks to make sure the current user is not an administrator. You can update the ‘administrator’ to be any user capability listed here That way, you can modify it to for example, allow only administrators and editors instead.
- ! wp_doing_ajax() checks to make sure we are not blocking any AJAX requests that maybe being performed from the front-end.
If all the checks pass and the code runs, the wp_redirect function redirects the user to whatever is inside the function. In this instance, we have set home_url() which means the function will redirect to the homepage. Update home_url() to any URL you like by going adding it with apostrophes. e.g. the following will redirect to the Web3 homepage.
[code type=”php”]wp_redirect( ‘https://web3.com.au’ );[/code]
Also, its good to note that this is only required for users that log into the WordPress dashboard. It doesn’t apply to non-logged in users because they do not have access to the dashboard in the first place.
Prevent user from accessing WordPress back-end with a plugin
There are plenty of plugins that prevent users from accessing your WordPress dashboard. In this tutorial we will be using the Remove Dashboard Access plugin.
This plugin does what its name says. It limits dashboard access by your choice of user role. You can choose where the user redirects to and optionally only allow access to the users profile on the back-end.
To install this plugin, log into your WordPress dashboard as an administrator and go to Plugins > Add New. Search for Remove Dashboard Access By Drew Jaynes. Install and activate the plugin.
[highlight type=”tip”]Need help installing the WordPress plugin? go to our WordPress plugin install guide to learn more.[/highlight]
The plugin adds a settings page in Settings > Dashboard Access.
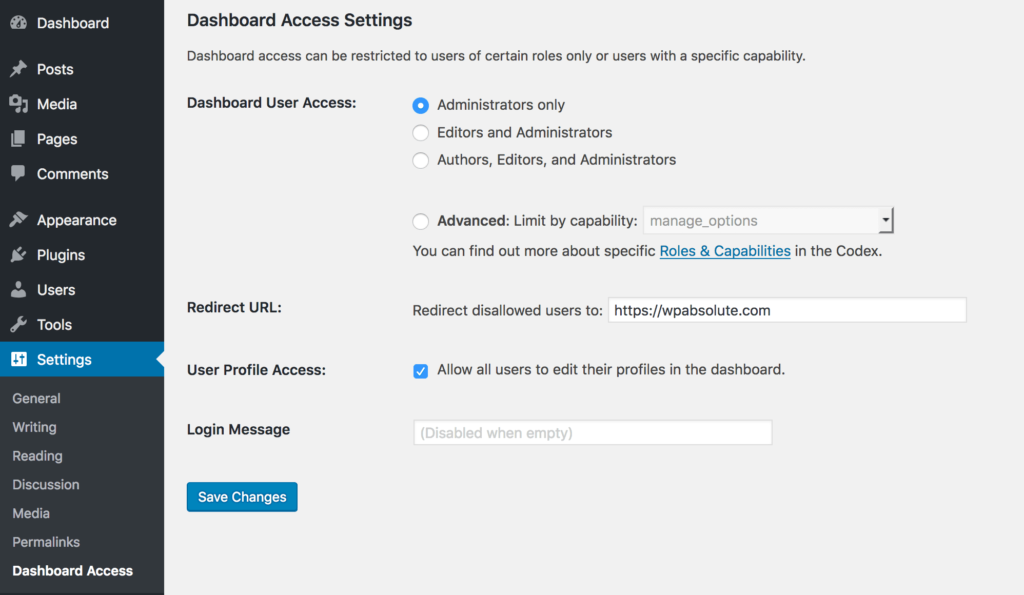
The first setting lets you choose what user levels should be allowed access to the back-end. You can either limit it by user role or by capability. All other users will be redirected to the URL you enter in the Redirect URL field.
Once you have configured the plugin, save the changes.
The admin dashboard should now only be accessible to the users with the roles you selected and all other users should be redirected to your designated URL.
Conclusion
Limiting access to your WordPress Dashboard is a rather simple process when you know how. In this guide we demonstrated how to limit access to only basic features as well as redirecting the user based on their role.
Whether you choose to lock out users using the code or plugin method, they are both two ways to control access to the dashboard for logged in users.
Now that you have locked or prevented your users from accessing the back-end dashboard, you may want to further enhance your site with more tweaks. You could prevent the admin bar from displaying on the front-end of your site or create front-end register and login forms to name a few. View all of our WordPress tutorials on our blog.
Do you have a website that requires preventing Dashboard access for your users? Tell us what methods you use and if any of the options shared were of any help.
Make sure you also join us on YouTube and Facebook to stay up to date with the latest WordPress tips and tricks.
Just to clarify, if I only ever intend to have “Subscribers,” and none of the other roles, than none of this matters, correct? I am having trouble understanding why Subscribers would be able to access the dashboard, or even see the admin toolbar while on the front end. This seems like something that shouldn’t be. Correct? Can anyone give a single reason why a Subscriber should be able to access the dashboard? Can anyone give a single reason why a Subscriber would need to access anything other than the front end? Can anyone give a single reason why a Subscriber would need to see the admin toolbar? This doesn’t make any sense to me.
That is correct. If people are simply viewing your site then you do not need to limit any dashboard access. Its only if you are extending the websites functionality for the user to interact with your site in certain ways will you need to use this code. This could be a number of reasons such as to access restricted membership content. Often subscribers will see the admin bar if they are subscribed to your blog posts but this all depends on how your website is setup.
Much appreciated! Great response time WP Absolute!