In this guide you will learn three separate ways how to create a login page on your WordPress website.
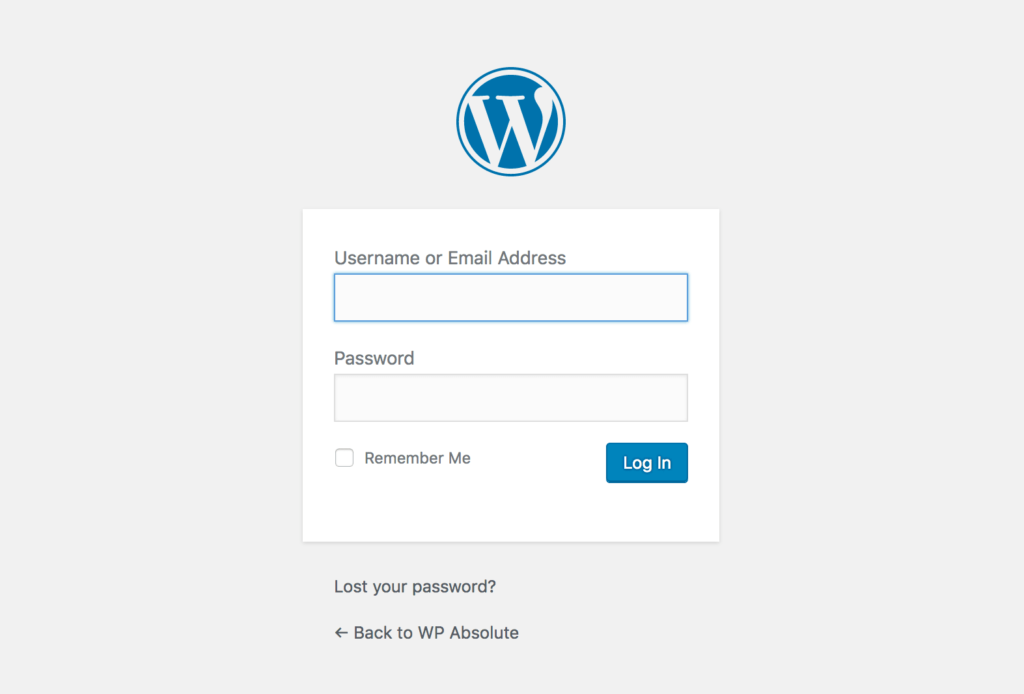
Sure you could just log in to your site using your /wp-login.php or /login link but that’ll just take you to the standard WordPress login page.
What if you want to make your own custom login page. One that better matches the styles and layout of your website. Say you want people to go to a custom login page like /welcome to log into your site, this guide will teach you how to do that.
We will cover three methods to achieve this:
- First we will use an existing plugin called Theme My Login.
- Secondly we will use Gravity Forms to manage the login process
- Thirdly we will create our own login form using a shortcode so that you can add the login form on any page you like.
Why create your own custom login page
When you have a website that has membership functionality, you may be restricting content to be accessed only by logged in users. Sure users may be able to log in using the WordPress admin login screen but what if you don’t want them to log into the backend.
With a custom login page you can customise the way the login page looks and feels. The login form can be placed on a page on the frontend of your site. This way it will retain the style and looks of your website whilst being able to still log in.
A custom WordPress login page will also look better with your own branding than the default WordPress login form.
Your custom login page will work just like any other page. You can add additional content and style it however you like. A benefit of having your own custom login is you can set the page of where the user logs into. You may want to restrict the user from being able to access the WordPress backend. With your custom login page, you can do that.

Option 1: Theme My Login – Custom WordPress login page
This option to creating your own WordPress login page utilises an existing WordPress plugin called Theme My Login.
You must first install the Theme My Login plugin from the WordPress repo. You can do this by logging into your WordPress website and going to the Plugins > Add new menu item. Search for Theme My Login and install the plugin. If you need more information or help on installing this plugin then see our guide on how to install a WordPress plugin.
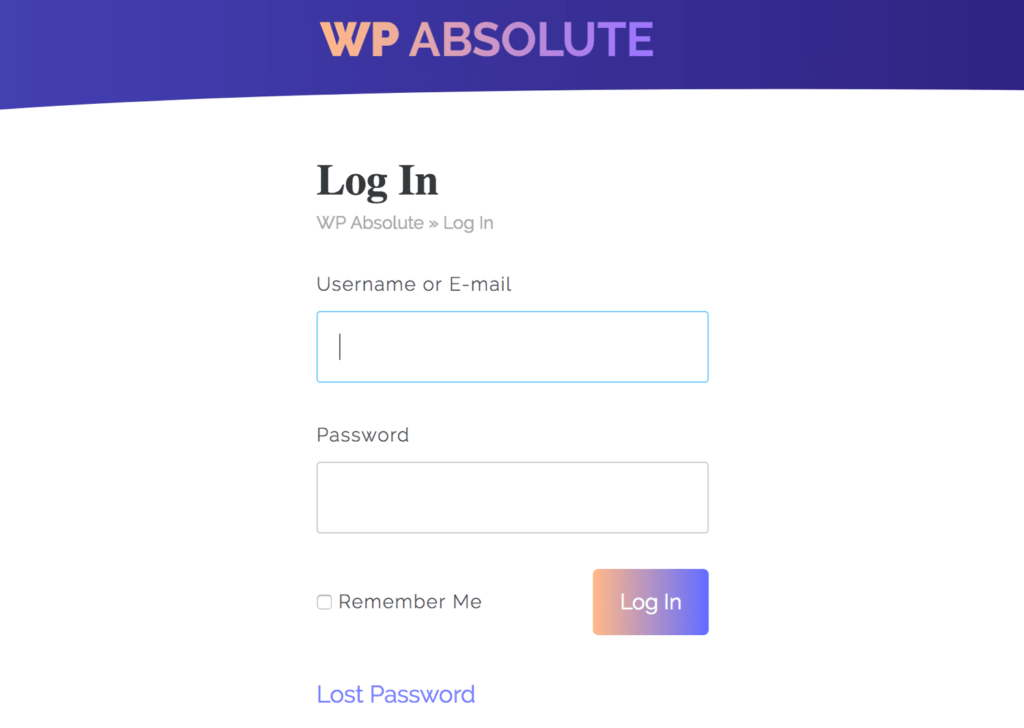
Once the plugin is installed, it will automatically activate the new login page on your website. You can then go to your login page /login on your site e.g. https://web3.com.au/login to access the new front-end login page.
There is a lot more to this plugin than just creating a custom login page. You can set custom emails to be sent, configure where the user should be redirected to, add reCAPTCHA to the login form and a number of other security options. To enable these features you have to enable each module on the TML options page.
If you would like to configure this plugin then you can go to the TML sidebar menu options page. This page has a number of options for you to customise the login form.
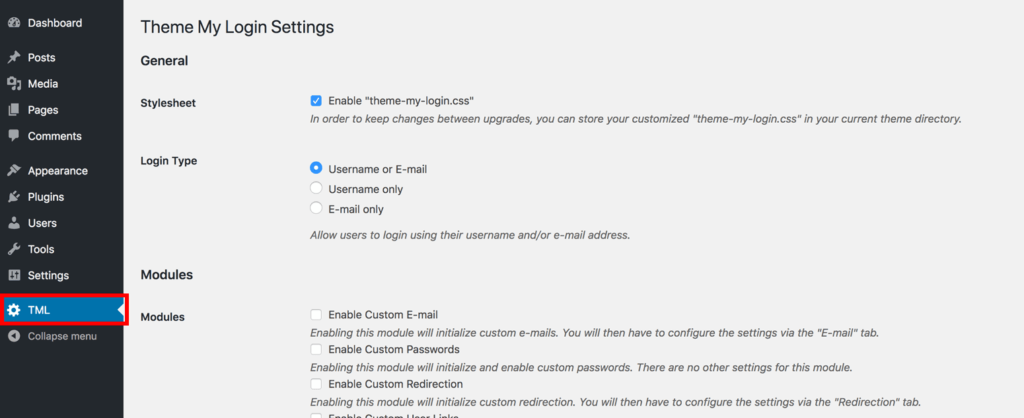
On the general page there is an option to choose your login type so you can choose whether you want to login to use an email address, username or either of the two as the username.
There is also the modules section. Check each module that you want to enable and save the changes for that modules settings to appear on the TML sidebar menu. You can then configure each modules settings for your site.
TML Module Settings
Enable Custom E-mail: The enable custom email settings page gives you the option to set your own emails that get sent out to the user.
Enable Custom Passwords: This lets the user that is registering (if self registering is enabled on your site) to set their own password.
Enable Custom Redirection: Lets you set where the user should be redirected to when they log into the site. You can choose to set this on a per user level basis.
Enable Custom User Links: Allows you to create custom links for each type of user level. This means that you can create for example a dashboard link and it will redirect to different pages based on your user level.
Enable reCAPTCHA: This enables the reCAPTCHA field on the forms to help prevent spam.
Enable Security: Security options to help protect your site.
Enable Themed Profiles: Allows you to enable themed profiles on a per user level basis.
Enable User Moderation: Allows you to make the user either have no registration moderation, email link verification or manual moderation from an admin user.
Theme My Login also includes a login form widget. It has a number of options that can be customized like showing when logged in or out and displaying links to login and register and reset your password.
Go to the Appearance > Widgets page to add the Theme My Login widget to any of your sidebars.
Let us know in the comments below if you are using this method on your website.
Option 2: Gravity Forms user registration and login
Gravity forms is one of the most popular WordPress form creation plugins around. Its an extremely powerful plugin that lets you do a lot of things.
From simple contact forms to forms that collect payments to user registration and login forms, gravity forms can do it. Gravity Forms is a premium plugin but chances are you are utilising it on your website already if you have some sort of form on it.
Note that this option requires you to have the Gravity Forms User Registration Add-On which is part of the Elite add-ons pack.
If you have not already installed, download and install the Gravity Forms plugin. You will need to upload the plugin to your WordPress website by logging in and going to the Plugins > Add new menu item. Click on the Upload Plugin button and install gravity forms. Again, if you need more information or help on installing this plugin then see our guide on how to install a WordPress plugin.
Create a User Registration form in Gravity Forms
Chances are if you are wanting to allow users to log into your website then you need them to register on your site. In this part of the tutorial we will create a user registration form and utilise the login form widget.
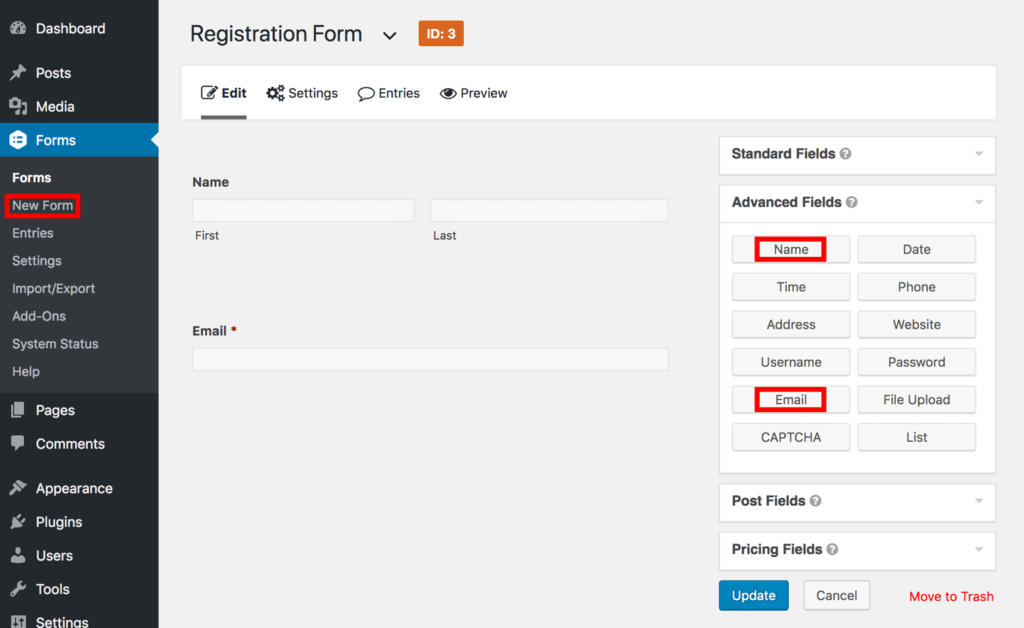
Once you have installed and setup Gravity Forms, create a new form by going to the Forms > New Form sidebar menu item. Call the form “Registration Form” and click the Create Form button.
In most cases, you’ll want to collect the following information from a user when they sign up:
- Name
- Email address
- Password
Additional fields can be included in the form but these are the bare minimum.
Add the two form fields to the form by clicking on them in the right hand menu. We will add a name field and an email field from the advanced fields section. The password we do not need to worry about as it will be automatically generated for you.
Make sure each of the fields are set to required so select each of the fields and click the “Required” checkbox under the general rules section.
Once you have finished configuring the form, click the update button in the right hand side.
Set User Registration settings in Gravity Forms
If you have not installed the User Registration add-on for gravity forms, you will need to do so by going to the Forms > Add-Ons sub-menu page in the sidebar. Select the Install button on the User Registration form and activate it. You can now configure user registration.
Before the form will automatically register new WordPress users, the User Registration add-on will need to know how to handle the information it’s given.
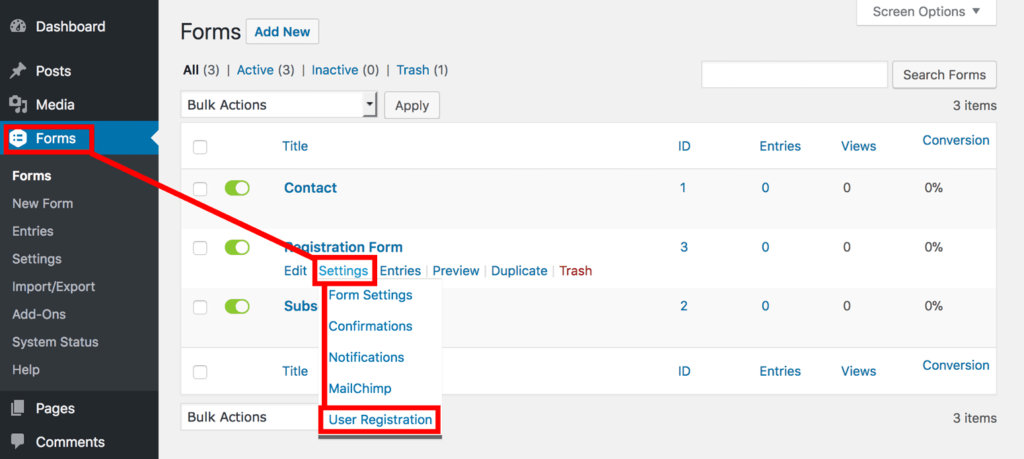
Go to Forms in the sidebar menu. Hover over your user registration form and in the settings menu, select the User Registration menu item. Click on the Add New button to create a new User Registration Feed.
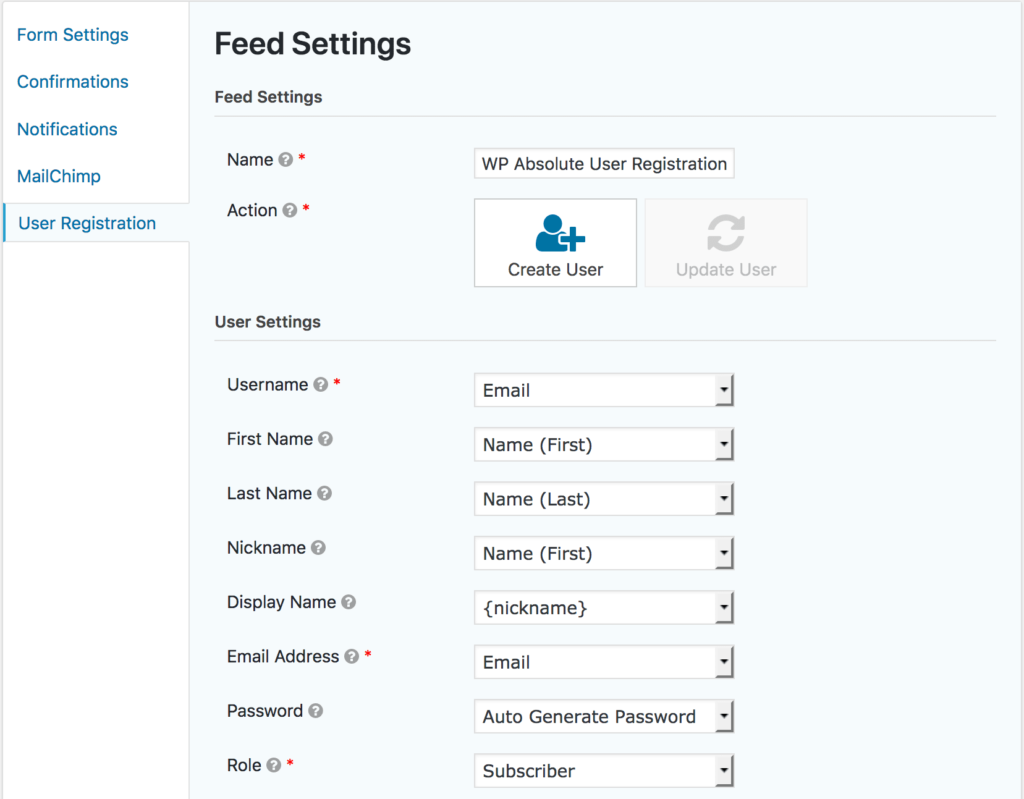
Give the new feed a unique name and choose the create user button. Tip: This is also the same place you go to create a feed to update user information if needed.
Under the User Settings field, select the dropdowns that correspond with the fields you added. You can use the email and name field for multiple options. Choose which user level the user will have from the drop down and then click the update settings field to create the feed.
You can now embed the user registration form that you created on any page to allow the user to register for your website. Embed the form by going to the page you want the register form on and clicking the Add Form button next to the Add Media button above your editor.
Creating the Login Form
Gravity forms does not have the functionality to create a custom login form but they do include a login form widget that you can include in any widgetised area of your site. If you would prefer to use a shortcode, we will cover creating a WordPress login form in a shortcode in the third option.
To add the login form widget to your site, go to the Appearance > Widgets page. Add the Login (Gravity Forms Login Widget) to your widget area and save to include the widget on your site.
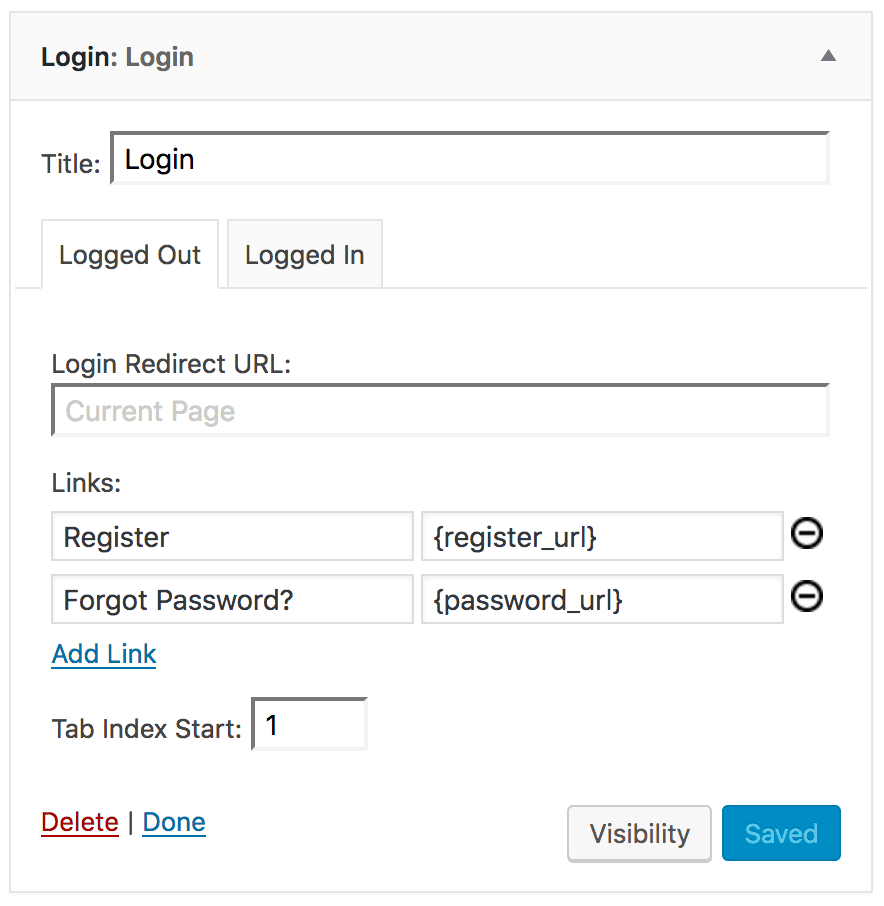
The widget will change based on whether the user is logged in or out. If the user is logged out the widget will display the login form. If the user logs in, it will hide the form and give you the option to display welcome content instead.
There are a couple of settings you can configure in the widget. The logged out state allows you to set the Login Redirect URL which is where the form will go once the user logs in. You can also configure the links (the register and forgot password links) that the user may access underneath the form.
The logged in tab of the widget settings allows you to set a custom message to logged in users. It also optionally shows the log out link and you can set where the page should redirect to once the user has logged out.
Are you using Gravity Forms on your website? Did you know that you can create a user registration and login form for your site? Add your comments in the comments section below.

Option 3: Custom WordPress login page and shortcode
Often there are times where you want to make things completely custom built. This allows for complete flexibility within your WordPress website. This option will allow you to code your own login form from scratch using the built in WordPress wp_login_form function.
The benefit of this is that the style of the form should fit with your themes existing form styles.
[code type=”php”]// A simple login form shortcode to display a login form on any page of your site.
function web3_login_form_shortcode( $atts, $content = null ) {
$a = shortcode_atts( array(
‘redirect’ => ( is_ssl() ? ‘https://’ : ‘http://’ ) . $_SERVER[‘HTTP_HOST’] . $_SERVER[‘REQUEST_URI’],
‘label_username’ => __( ‘Email’ ),
‘label_password’ => __( ‘Password’ ),
‘label_remember’ => __( ‘Remember Me’ ),
‘label_log_in’ => __( ‘Log In’ ),
‘remember_checked’ => true,
), $atts );
$args = array(
‘echo’ => false,
‘remember’ => true,
‘redirect’ => esc_url( $a[‘redirect’] ),
‘label_username’ => esc_attr( $a[‘label_username’] ),
‘label_password’ => esc_attr( $a[‘label_password’] ),
‘label_remember’ => esc_attr( $a[‘label_remember’] ),
‘label_log_in’ => esc_attr( $a[‘label_log_in’] ),
‘value_remember’ => $a[‘remember_checked’]
);
return wp_login_form( $args );
}
add_shortcode( ‘login_form’, ‘web3_login_form_shortcode’ );[/code]
Put the above code into your functions.php file in your child theme. The above code creates a shortcode called “[login_form]”. To use the shortcode simply copy and paste the [login_form] shortcode onto the page you are wanting to display your login form on.
The shortcode has a number of optional attributes you can tweak too. All of the attributes are:
[code type=”php”][login_form redirect=”” label_username=”” label_password=”” label_remember=”” label_log_in=”” remember_checked=””]
// With demo example
[login_form redirect=”https://web3.com.au” label_username=”Your Username” label_password=”Your Password” label_remember=”Remember?” label_log_in=”Log In Now” remember_checked=”false”] [/code]
- redirect: This is the page that the user will redirect to once they successfully login.
- label_username: The label for the username.
- label_password: The label for the password.
- label_remember: The label for the remember me field.
- label_log_in: The label for the log in button.
- remember_checked: Whether the remember me field should be ticked by default or not.
The above form is a super simple form that will allow you to display a login form on any page of your website. It is a good foundation to begin with when you are building your own login pages in WordPress. The wp_login_form has a number of additional options you can use that are available in the codex.
If you would like more of a foundation then be sure to check out our free login form shortcode plugin on our downloads page.
Add your feedback and comment if you are using this code on your website.
Conclusion
Custom login forms are always handy when you want the login and register process to be streamlined and match your websites design. You need a login form if you want to create a membership style website.
This article should have given you a good understanding on how to create your own custom login forms on your WordPress website.
Do you have custom login forms on your website? If so, did you follow one of the methods in this guide? Let us know how you went in the comments below.
Now that you have a custom login form, you may want to checkout this guide on how to hide the WordPress admin toolbar from logged in users if you don’t want them to access your admin dashboard.
Don’t forget to join us on Facebook to keep up to date with the latest tips and tricks about getting the most out of your WordPress website. Also subscribe to our YouTube channel to see our tutorials in video form.
Very helpful! Hi, how do I hide the wordpress toolbar from logged in users?
Hi Dan,
Yeah I have made a tutorial for you here: https://web3.com.au/hide-wordpress-admin-toolbar/ Let me know if you need a hand with this.