Do you want to setup a WordPress multisite network on your WordPress website? WordPress has the ability to create multiple websites using a single WordPress install.
In this guide, we will be covering absolutely everything to do with WordPress multisite. We will install and setup a WordPress multisite network and show you how to use the multisite network too.
This guide covers a lot of areas of WordPress multisites so to help you better navigate, here is the articles table of contents:
- What is WordPress Multisite?
- Requirements for a WordPress multisite network
- Installing your WordPress multisite network
- Configuring multisite network settings
- Adding new sites to your WordPress multisite network
- Adding themes and plugins to your multisite network
- Troubleshooting WordPress multisite issues
What is WordPress Multisite?
A WordPress multisite network give you the ability to run and manage multiple WordPress sites from a single WordPress installation.
Creating a new site in your WordPress multisite network is a very simple process and you can launch it instantly. Once the multisite is setup, you can manage each of the sites from a single WordPress user login and password.
Each site has its own set of privileges so users can be allowed to login to only the sites that you give them access to.
Pros of using a WordPress multisite network
There are a number of reasons why a WordPress multisite network may be more beneficial to use than managing multiple standalone WordPress sites.
You may choose to use a WordPress multisite network because you can:
- Easily manage every single site from a single dashboard if you are the network administrator.
- Setup completely different access privileges for each of the sites that the user can access under the multisite network.
- Install plugins and themes in the multisite and they can be activated across any site you choose. You can even install a different theme for each site or create child themes for the main theme.
- Update the themes and plugins and not have to worry about having to install them for every site. When you update a theme or plugin, it will automatically update for every site on your network.
Cons of using a WordPress multisite network
WordPress multisite networks are not meant to be used by everyone and may not suit your needs. There are some downsides that you should be aware of so that you can make an informed decision whether multisites are right for you. Here are some of the reasons why you might not want to use a multisite network:
- Because all sites utilize the same resources (WordPress system files, WordPress plugins and WordPress themes), if an error occurs or your server goes down, it will apply to all of the sites in your multisite network.
- Server resources may be affected by some sites on a multisite setup. If you have many sites on your network, you must be careful of unexpected traffic. If one site receives a spike in traffic, all other sites may be affected by this.
- If your website gets hacked, then it means the hacker will be able to hack every site on the network.
- Some WordPress plugins are only designed to be used on a single-site install. They may not work well on a multisite network.
Who needs a WordPress multisite network?
Even though you may manage multiple websites, that may not be enough reason to setup WordPress as a multisite.
After all, third-party tools like Infinite WP and Manage WP are a couple of great tools that will help manage all of your websites in the same place.
If you are thinking about creating a WordPress multisite then here are a couple of scenarios when multisite might be a good idea:
- A network of blogs running on multiple subdomains.
- A magazine website where different topics are managed by separate departments of your team.
- A business, government or non-profit website where sub-sites are used for different branches or locations.
- A School or college allowing students to create their own blog on school servers.
Multisite is flexible enough that if you need a network of sites all managed from one location, then WordPress multisite can do that for you.
Requirements for a WordPress multisite network
Having good WordPress hosting and being able to connect into it are the two main technical requirements for setting up your WordPress multisite.
You need to have good WordPress hosting because it uses up more server hosting resources than a single site install. The reason for this is because all of the sites on the network share the same server resources.
If your multisite network runs a couple of small and low traffic websites then you might be able to get away with using just a basic shared hosting plan. But when your websites gain traffic and begin to grow, you will quickly outgrow that hosting because multi-sites simply need more power.
On our choosing the right WordPress hosting guide, we talk about the different types of WordPress hosting you can choose from. It is recommended that you use the best type of hosting you can afford. That is VPS or dedicated hosting.
Bluehost is an affordable VPS hosting provider and is one of WordPresses official recommended hosting companies. We use WP Engine to run all of our websites as well as our agencies clients websites. A number of these websites are running multi-site setups and work perfectly.
You need to connect into your hosting server either by file management or FTP connection to edit some of the WordPress files. You only need the basic knowledge and we will cover all the steps in this tutorial. These files need to be edited to enable multisite.
Choosing a domain structure for your multisite network
With WordPress multisite networks, you can either setup each website in three different ways.
We will be covering each method below. Here are the options you have:
- Domain
If you want each WordPress website to have its own unique domain then this is your option.
Example: your first sites URL is https://web3.com.au your second sites URL is https://web3.com.au. This method is the most involved because it requires domain mapping. - Subdomain
If you want each of your additional sites to have their own subdomain then this is your option.
Example: Your main site is https://web3.com.au and your second site is https://tutorials.web3.com.au/
This method also requires you to configure a wildcard setting for subdomains. We will show you how later in this guide. - Sub-directory
If you want each new site to operate under a sub-directory or path based URL then this is your option.
Example: Your main site is https://web3.com.au and each additional site will be https://web3.com.au/tutorials/.
This is the least recommend method as all websites have sub-directories to indicate what page they’re on. It can sometimes get confusing when you have similar URL structures for each site.
Having said that, this option does not require any DNS tweaking. It just requires you to turn on pretty permalinks in WordPress settings on your base site.
Setting up wildcard subdomains
This section of the guide is only required if you are choosing to use (option number 2) Subdomains on your multisite.
If each site is to run under its own subdomain then you need to add a wildcard so that the domain knows what to do. A “wildcard” is a record on your domain name settings that is used to apply to every subdomain and direct them to where they need to go.
It is usually displayed as a * (star sign) in your DNS setting to indicate that it should apply to all.
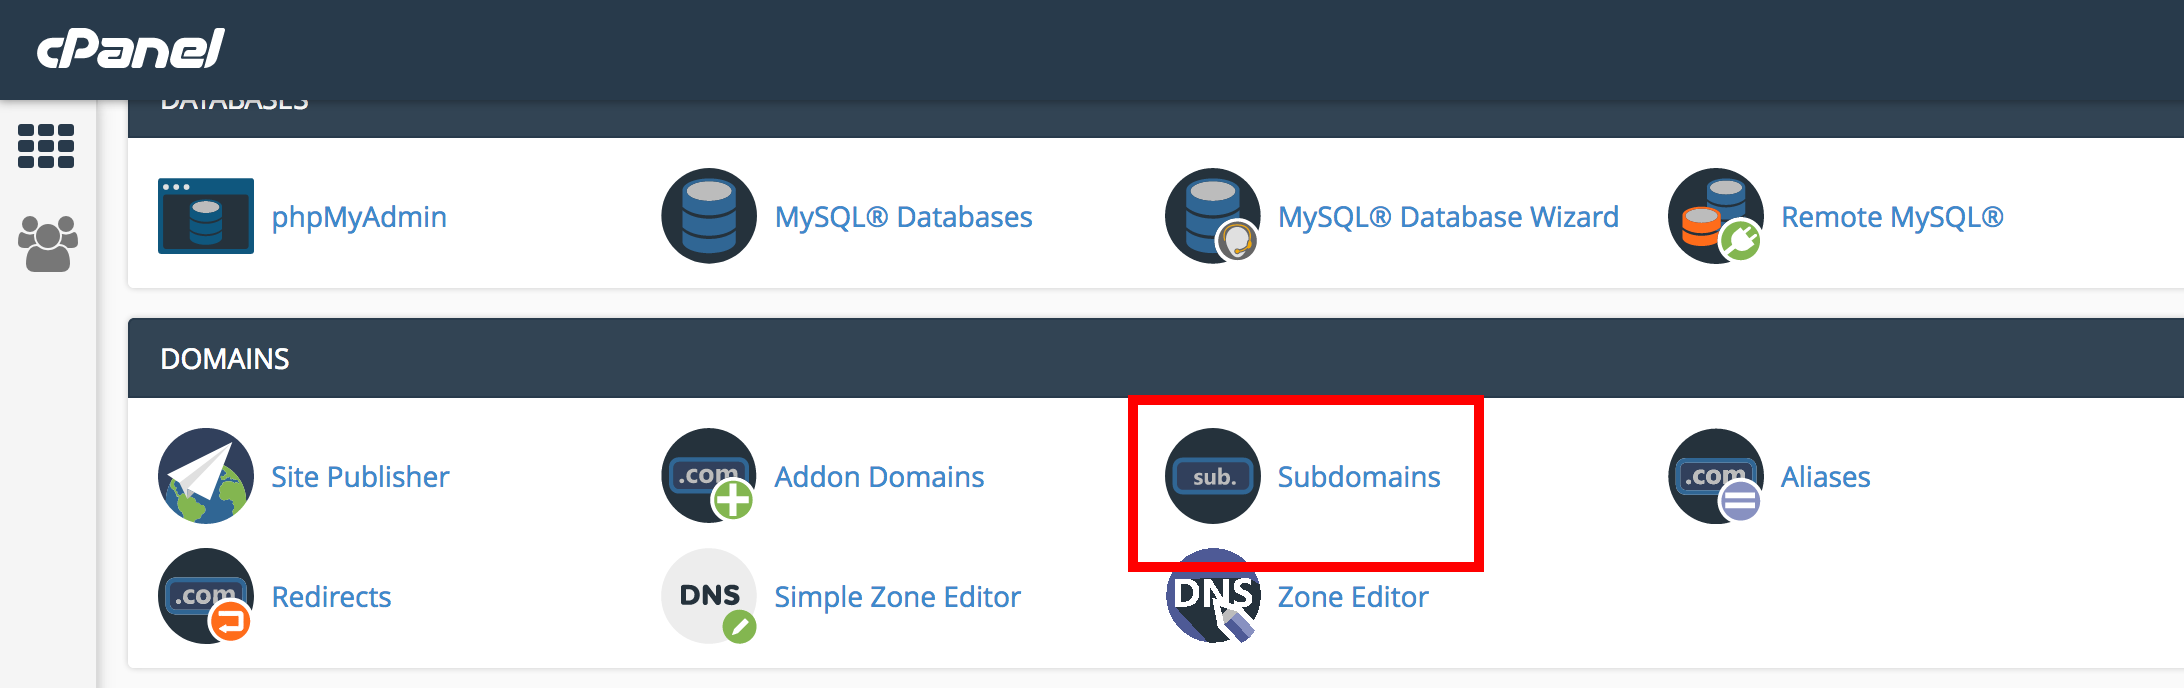
Setting wildcards in cPanel
If your domain name settings are managed through your cPanel then follow these steps.
NOTE: Your cPanel may look slightly different to ours depending on the cPanel theme and version you are using. Our screenshots are from the latest cPanel demo available.
1. Log into cPanel
Log into your hosting providers control panel or cPanel dashboard.
2. Access subdomains
Scroll down to the Domains section and click on the subdomains icon.
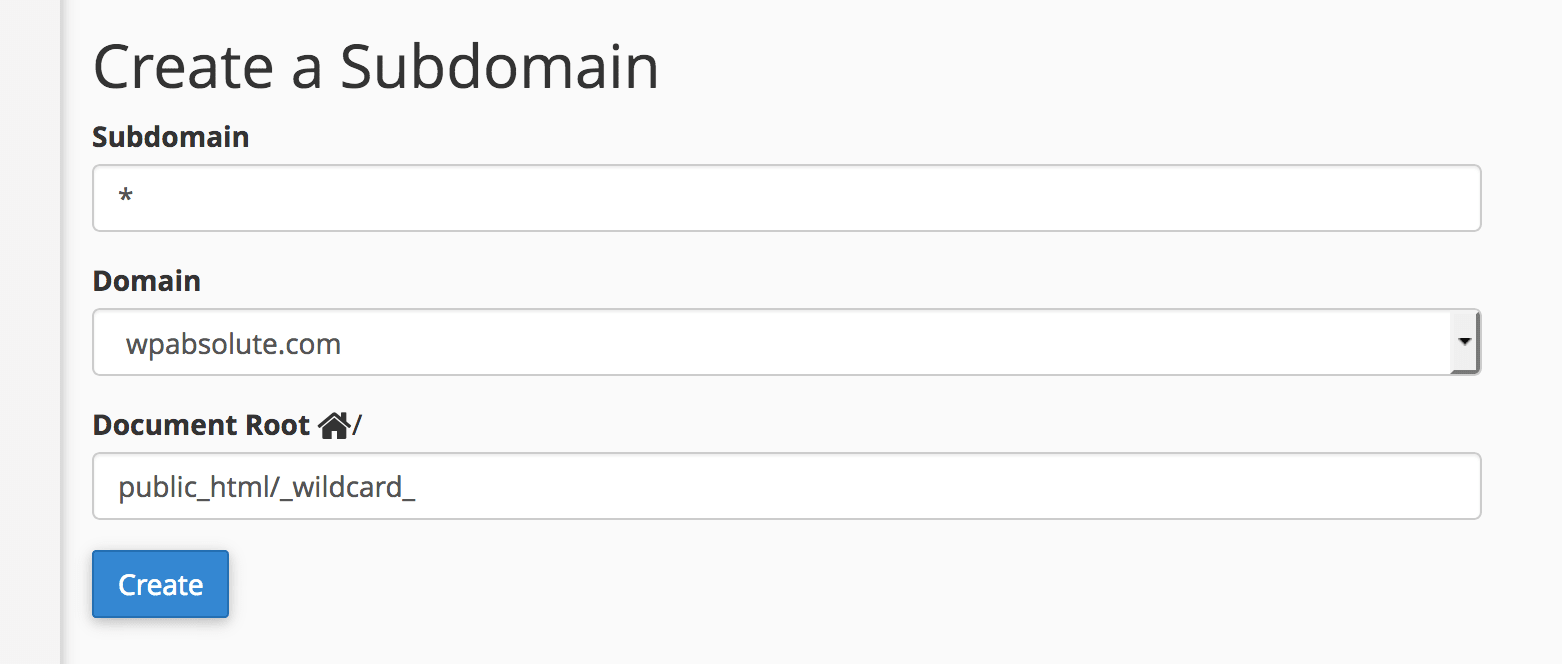
3. Add Wildcard
Scroll down to the Create a Subdomain section.
Enter * in the subdomain field.
Select your domain in the dropdown and the document root field should automatically populate for you.
Once the fields are populated, click the create button to add your wildcard subdomain setting.
NOTE: If your domain has DNS hosting or is using a provider like Cloudflare then you simply need to access that control panel to add your domain wild card. There are too many providers to list but if you get stuck, write your comment and we will try to help out where we can.
Installing your WordPress multisite network
Multisite is a feature that comes built into every WordPress website however it is not activated by default.
After you have installed WordPress like you would without multisite, you can enable the multisite features. Multisite features can be enabled on every WordPress website.
You will be making a number of changes to WordPress so it is a very good idea to do a complete backup of your site before you proceed any further.
1. Connect to server
Either connect to your server using an FTP connection or open up your cPanel and use the File Manager in the Files section to access your websites files.
2. Edit wp-config.php
Navigate to the base directory of your WordPress install and open and edit the wp-config.php file.
Add the following code to its own line in the file. Place the code just above where it says /* That’s all, stop editing! Happy blogging. */. If it doesn’t say that anywhere, then add the line somewhere above the first line that begins with require or include:
Once you have added the line, save and close the file and make sure it is uploaded onto the server.
The above code enables multisite. We now need to log into your website to set it up.
Configuring network settings
1. Log into WordPress
Log into your WordPress website. If you successfully added the enable multisite code to your wp-config.php file in the previous steps then you should see a new Network Setup submenu page in the Tools menu.
2. Deactivate Enabled Plugins
Before you can begin setting up your WordPress multisite settings, you need to temporarily deactivate all of your enabled WordPress plugins.
Go to Plugins > Installed Plugins and deactivate all the plugins that are enabled. You can tick all the enabled plugins and use the Bulk Actions dropdown to deactivate all the plugins at once.
3. Access Network Setup page
Once all plugins are deactivated, select the Tools > Network Setup submenu page to get started with the Multisite setup.
If you website is not new then you will only be given the option to create multisite under a sub-domain setup. If its new then you will be able to set it up in a sub-directory.
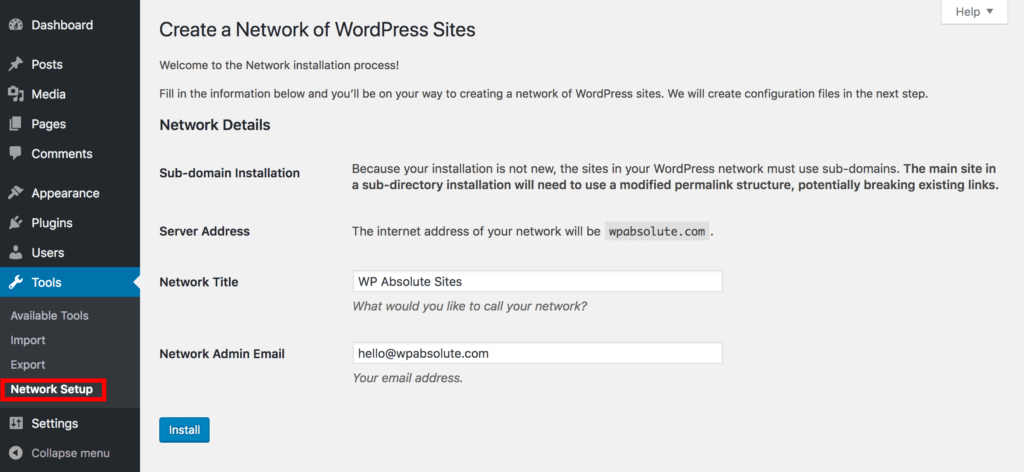
Fill out the fields by giving the multisite network a title and make sure your email is correct as the administrator of the network.
When complete, click the install button to proceed to the next step.
4. Enabling the Network
WordPress will generate the necessary code that you need to place in both your wp-config.php file and .htaccess file.
Both of these files are stored in your hosting server in the root directory. See tip below if you cant see the htaccess file.

Copy all the define tags and place them into your WordPress installs wp-config.php file. They can be placed on their own lines just underneath the previous line you added or above the line reading /* That’s all, stop editing! Happy blogging. */
Copy the .htaccess file contents and paste it into your .htaccess file on the server. You will need to replace any of the lines of text in there with what has been generated.
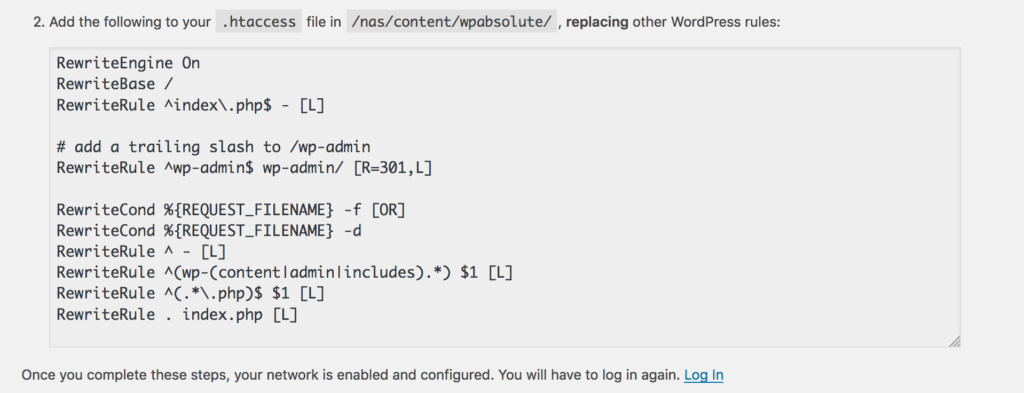
Once both of the files have been saved, make sure you upload them overwriting the previous files on the server.
TIP: showing hidden .htaccess files. Because files starting with a . are treated as hidden on most hosting servers, you may need to show hidden files first. In cPanel File Manager you can show hidden files by clicking the settings button in the top right corner and selecting the “Show Hidden Files (dotfiles)” checkbox.
If you are using an FTP application, You may need to go into the applications preferences to show hidden files.
Once the files are saved and you go back to your WordPress websites dashboard, you will need to refresh the page and log back in again.
Your network should now be active, you just need to configure your multisite networks settings and add your sites.
Configuring Network Settings
To configure your network settings, you will need to log in with an admin account and access the Networks settings page.
In the top admin bar, there is a new My Sites menu which enables you to manage your sites. There are quick links that allow you to access the common areas of you Multisite network.
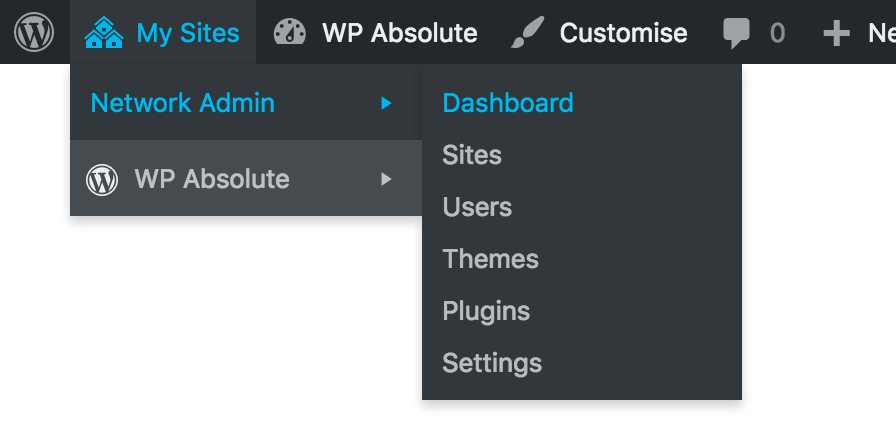
Navigate to your Network dashboard by hovering over the menu My Sites > Network Admin > Dashboard. You can also access this page by going to example.com/wp-admin/network/ where example.com is replaced with your domain name.
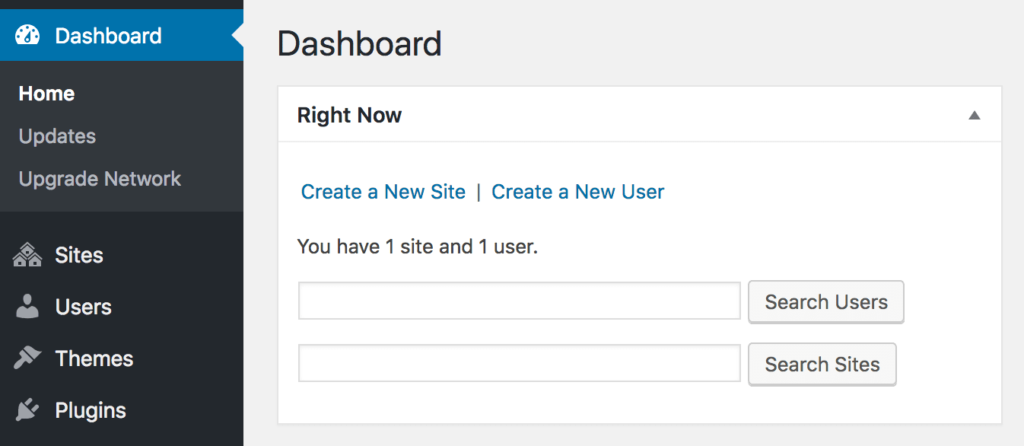
On this page you can either add a new site, add a new user or search the two.
Navigate to your Network Settings by hovering over the menu My Sites > Network Admin > Settings. You can also access this page by going to example.com/wp-admin/network/settings.php where example.com is replaced with your domain name.
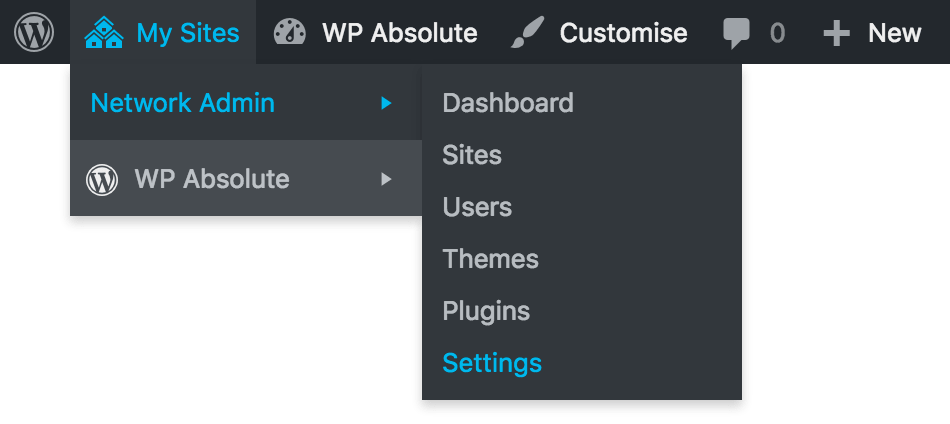
The Network Settings can also be accessed in the Settings > Network Settings sidebar menu.
The Network settings is broken up into several section. There is settings for Operational, Registration, New Site, Upload, Language and Menu settings.
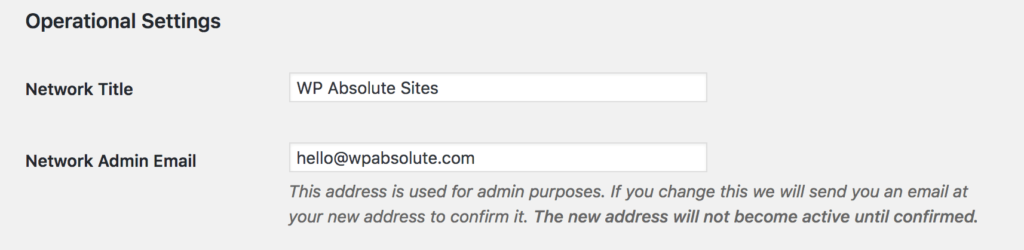
Operational Settings
Here you configure the name of the multisite network and the admin email address for notification purposes.
Registration Settings
These are settings related to the registration of new sites and user accounts. You can choose to enable users to register themselves and create their own sites. It is important to be careful what privileges you give. By default both options are disabled but you can open it up if needed.
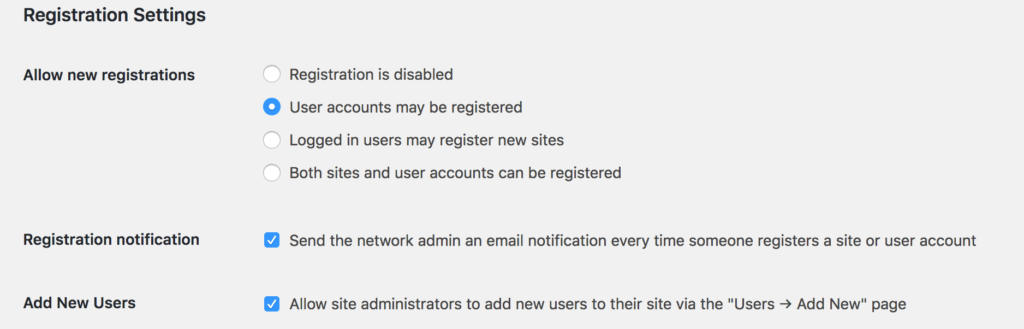
You can be notified when someone registers a new site or user account by checking the checkbox.
You can also ban certain site names from being activated as well as users from specific domains that you set. This is useful if you only want users from your domain to be able to register on the site.
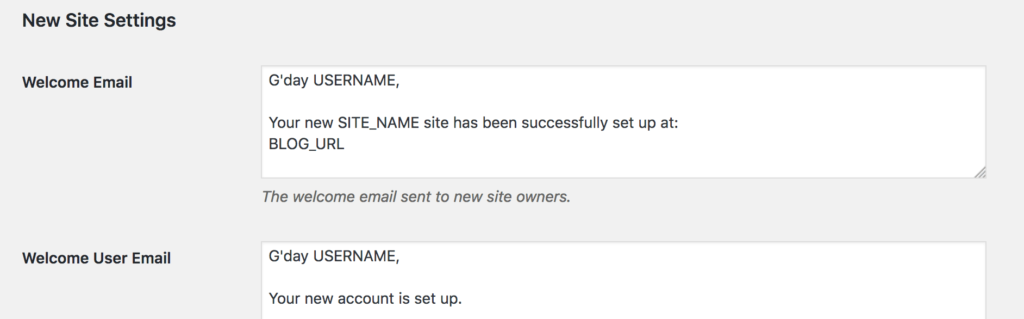
New Site Settings
The New Site Settings allows you to set the defaults for each of the new sites that get created. These are templates that get applied to each new site.
Upload Settings
The upload settings allows you to restrict the uploads that occur on each site.
You can limit the maximum upload size and the total space the site has. You can also limit what types of files can be uploaded by listing their filename extensions.
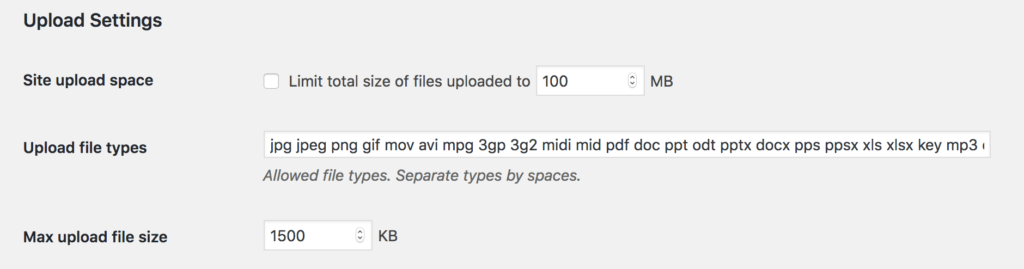
It is important to be aware of the available server resources you have. If your server is limited then it is important to set the limitations here so your hosting does not get overloaded.
Language Settings
The Language setting is just a drop-down to allow you to choose what language the sites should default to.

Menu Settings
The Menu Settings allows you to enable or disable certain admin pages on each sites dashboard.
The option is to enable or disable administration of the plugins page.

If you want plugins to only be administered by the sites admin then you can disable this option. Admins of each site wont be able to administer plugins. If it is checked, admins will be able to enable or disable plugins but they wont be able to delete plugins.
Go through each of the settings and customize it to your preference. Once it is complete, click the Save changes button to save your network settings.
Adding new sites to your WordPress multisite network
You can add new sites to your network by going to the network admin sites page. Access this page by going to My Sites > Network Admin > Sites in the admin top bar.
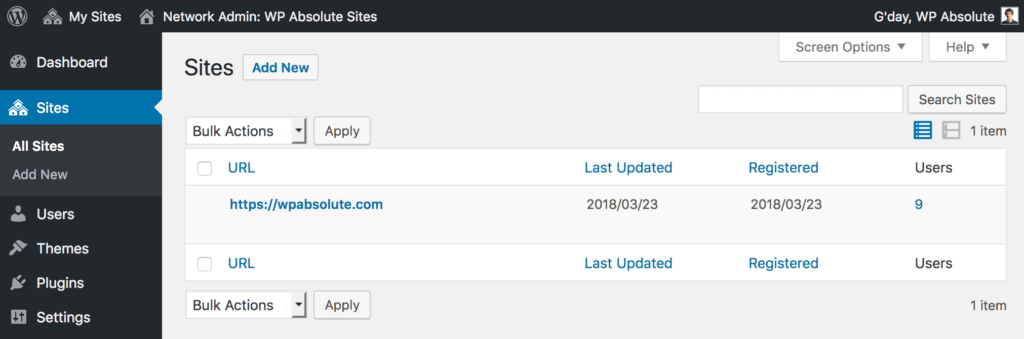
This page lists all of the sites on your multisite network. You can add a new site by clicking the Add New button.
On the add new site page you will be able to set the options for the new site.
Set the Site Address (URL) for the URL you will be using to access your new site. The field should only be the part of the URL that will be created to access your site. You don’t need to enter your full site URL.
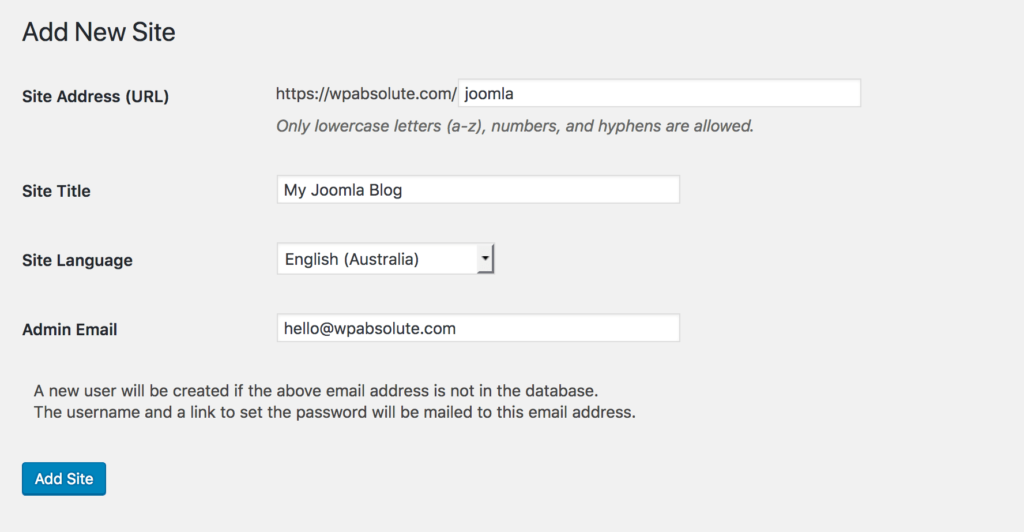
Add your new sites title, language and the admin email that will be administering the new site. If the new user is not already a part of your network then they will be created and a link to set their password will be emailed to them.
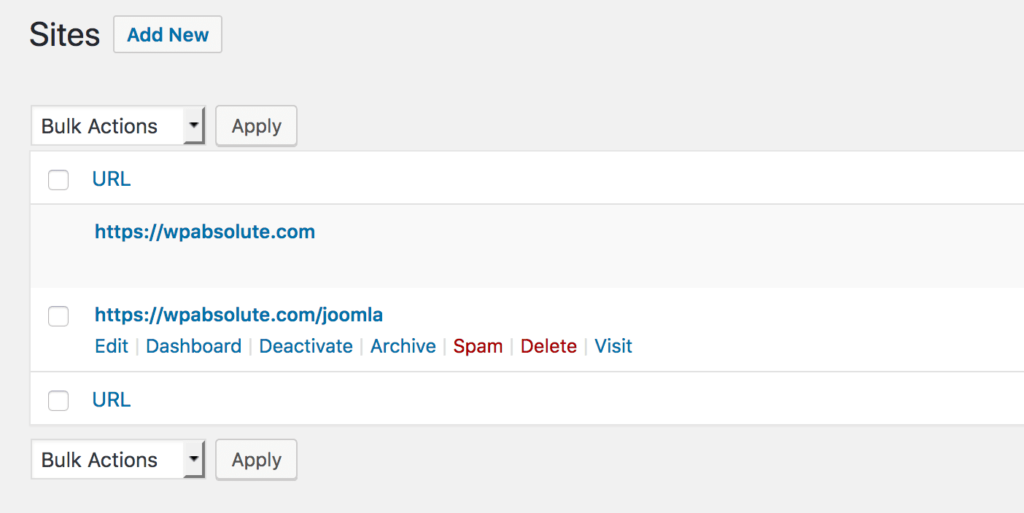
To create your site, click on the Add Site button. The site will be added to the sites page in your network admin pages.
Because you are the network administrator, you will receive an email notifying you that the site has been created.
To manage the network settings of the new multisite, go to My Sites > Network Admin > Sites.
Adding themes and plugins to your multisite network
WordPress multisites are designed to only have one location for all of the themes and plugins across all of the sites. This is so you don’t have to maintain versions for every single.
Because of this, you can not install new themes or plugins from a single site install. Themes and Plugins need to be installed from the Network Admin dashboard. After you have installed the plugin or theme, administrators of each single site will be able to activate or deactivate the theme or plugin.
Installing themes
To add a new theme to the multisite network, go to My Sites > Network Admin > Themes. The install a theme process is almost identical to what it is on single sites.
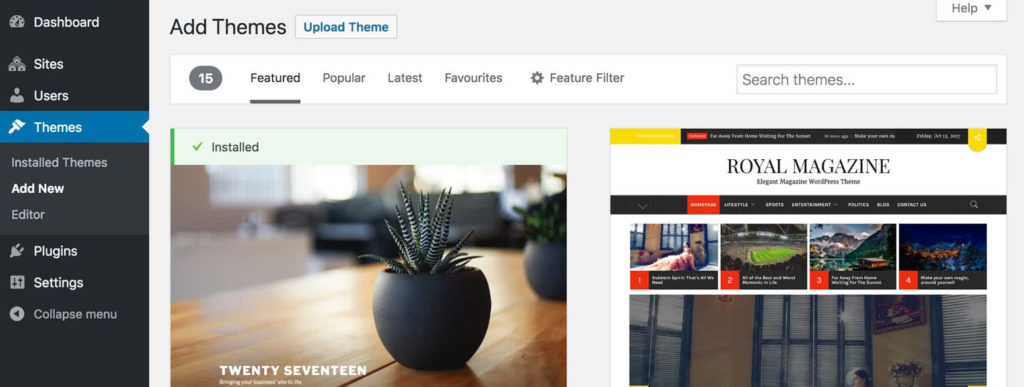
Once the theme is installed, you can enable access to the theme across the network by clicking on the Network Activate Link. Likewise, you can disable the network theme by clicking on the Network Disable link.
Installing plugins
The same goes for plugins as does themes. You can add a new plugin from the admin bar My Sites > Network Admin > Plugins page.
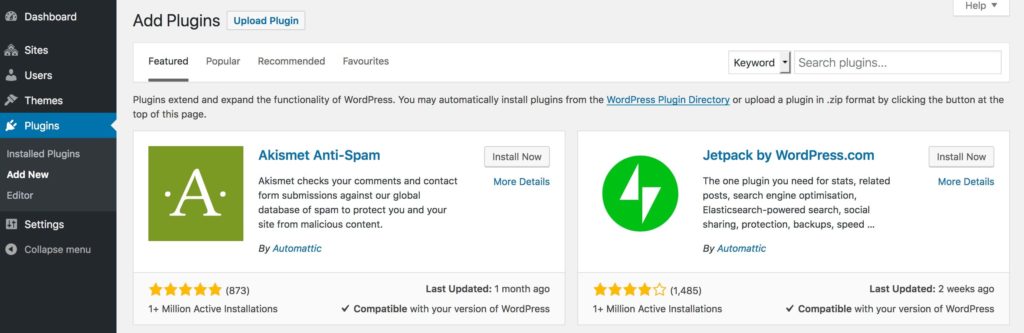
Click on the Add New button to install a new plugin. Once the plugin is installed, you can choose to network enable the plugin. This means that the plugin will be activated on all site installs. Similarly, you can click the Network Deactivate link to disable the plugin for all sites.
TIP: If you have enabled the Plugins Menu for site admins in the Network Admin Settings, then site administrators will be able to activate or deactivate installed plugins on their own in the single site admin page.
Troubleshooting WordPress multisite issues
There are many steps required to completely setup a WordPress Multi-site network. If you misconfigure some of the settings then errors can occur.
Fortunately if an error is done, an error can be undone.
Errors are most common when you do not configure the subdomains wildcard correctly or you do not edit the files on your server correctly.
If there is an error regarding setting up the subdomain wildcard, make sure you hosting provider supports wildcard domains. You can easily find out by getting in contact with your provider. All good WordPress hosting providers will support wildcards so it is a matter of following their instructions if the steps listed above do not fit with your setup.
If your multisite network is using sub-directories to access the site then you may come across some users not being able to login to the admin area of your site after add the required code in wp-config.php file.
To fix this, open up wp-config.php in your editor and change define('SUBDOMAIN_INSTALL', false); to define('SUBDOMAIN_INSTALL', 'false');
Conclusion
If you managed to follow along correctly then your WordPress site is now running a multisite network!
Did this guide help to setup multisite? Let us know how you went in the comments.
We covered why you should install a multisite and when is and isn’t the right time to use multisite. We covered the prerequisites to setting up a WordPress multisite and then we walked you through how to setup the network.
Finally we shared the most common fixes to errors that can occur with a multisite.
Next step is to make sure you have the right plugins installed.
And just in case you were wondering, yeah the reference to Joomla was a joke! ;P Were loyal WordPress fans and will be sticking with WordPress!