Have you ever needed to log into your WordPress dashboard but forgotten your logins or don’t have a user account?
You could click the “Lost your password?” link then reset your password but what if you don’t have access to the email account that the email will be sent to?

Fear not! We will get you into your WordPress back-end by the end of this guide.
If you have access to your websites hosting server control panel then you should be able to access the database. As long as you have access to the database, then you can access your WordPress back-end.
There are two ways you can re-gain access to your account. You can either edit the password of an existing account or you can insert a new account directly into the database. You can bypass needing to use WordPress altogether for all of this and then at the end, you will have access to your WordPress dashboard again.
To do either of these steps, you obviously need access to your hosting servers control panel. If you are the owner of the site then you should have received an email with details of how to connect to your Hosting cPanel or equivalent control panel.
In this tutorial we will be using phpMyAdmin which is the most common hosting server database management tool to access and manage your database. Regardless of what hosting server you have, the code is MySQL so you can execute this code in any MySQL WordPress database for it to work.
How to update a WordPress user password via phpMyAdmin
This is by far the simplest of the two methods. This method allows you to update any WordPress users password to whatever you set.
We will assume you have logged in to your cPanel and are in your databases phpMyAdmin.
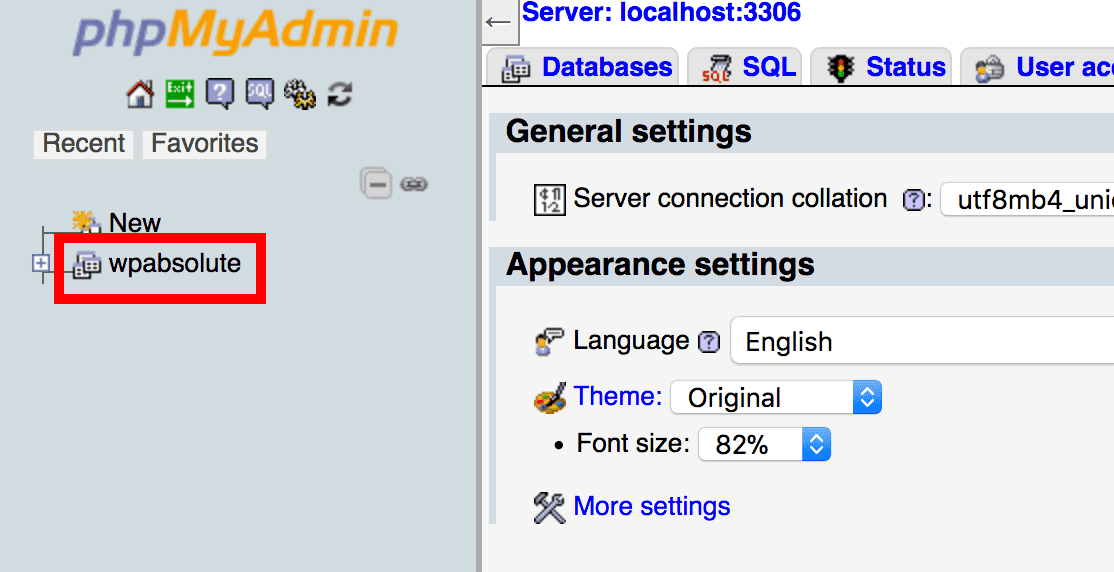
1. Select Your Database
In the sidebar, select your websites database. It will be something like wp_web3. The name will vary buy you should be able to identify it especially if there is only one database on your server.
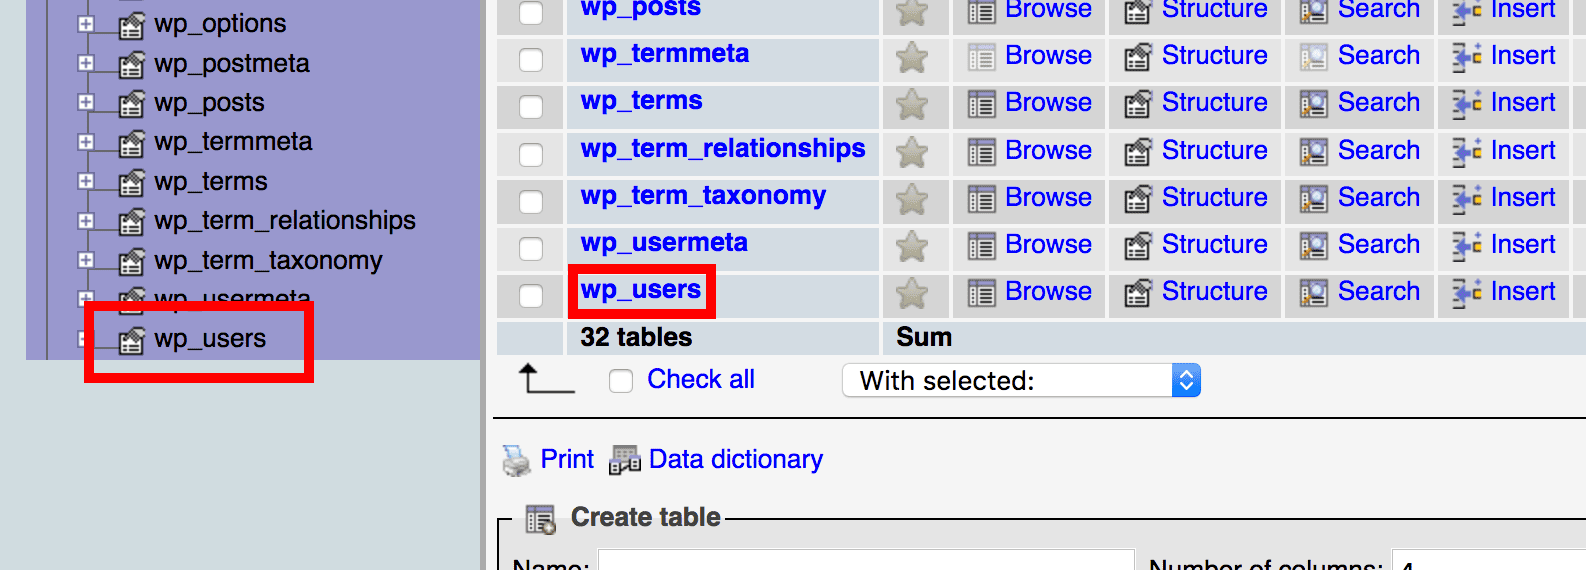
2. Select Users Table
A list of all the tables in your database will be listed in the main columns of your site. Click on your users table. This table will look something like wp_users. The first part before the “_users” may differ depending on your databases table prefixes.
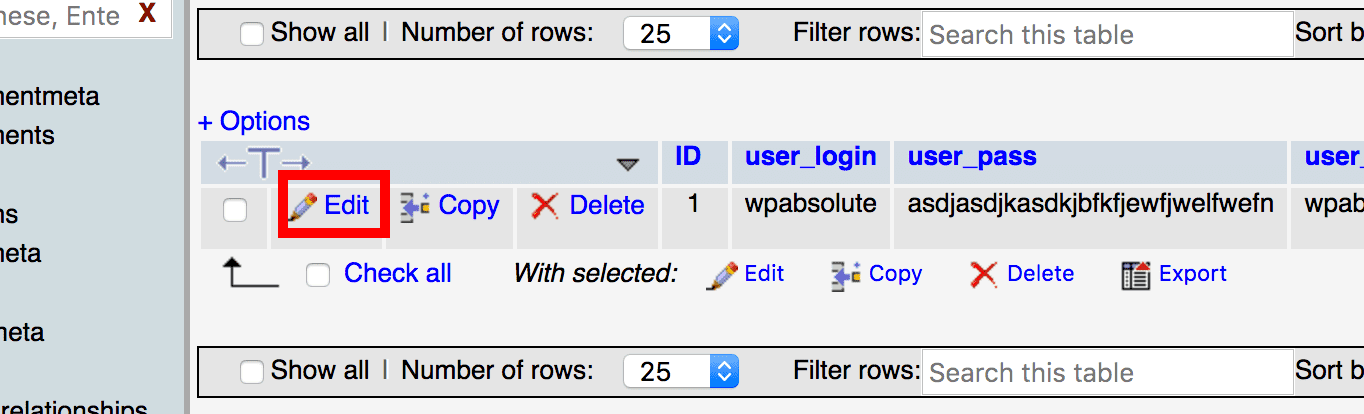
3. Find and Edit User
Scroll to the user that you want to update the database for. If there are several users, you may need to scroll to the next page to find the user you want to update.
When you have found the user you want to update the password for, click on the Edit link in their corresponding row. You will be taken to the page where you can edit the single users data.
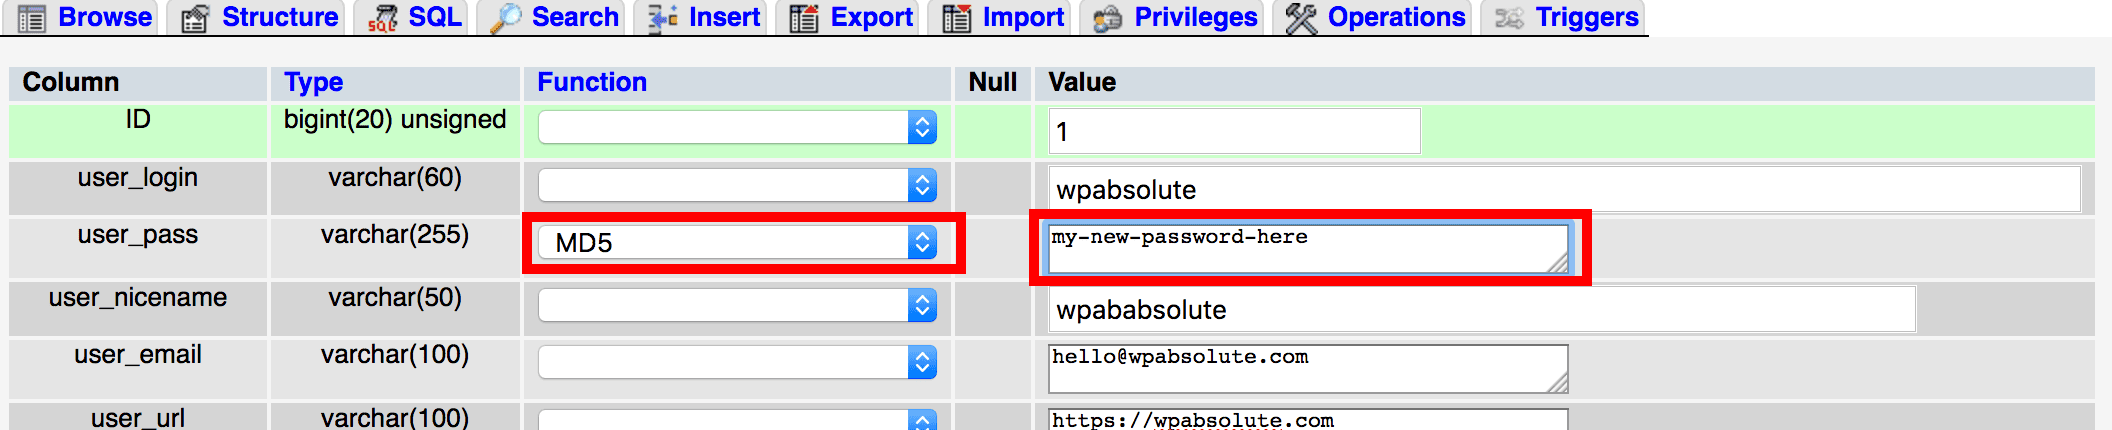
4. Set New Password
On the row that says ‘user_pass’, select the function drop-down and set it to MD5. In the value field next to it, type in your new password.
Make sure the password is written correctly and then click the Go button to update the users password.
The password for the user you just selected is now updated. You can go to the WordPress login screen to log in with your new password.
How to create a WordPress user admin account via phpMyAdmin
If you need to create a user account in WordPress but you do not have access to any accounts then you can create one in phpMyAdmin.
This method lets you create a new user in your WordPress account so that you can then use it to log into your WordPress back-end.
We will assume you have logged in to your cPanel account and using phpMyAdmin.
If you are familiar with the WordPress database tables then you might presume that the users table is where you go to insert a new user. Although that may be true, you also need to add user meta information to tell WordPress that the user is an administrator.
A couple of things to note before you begin
You need to know a number of values before you can proceed:
- ID: The next number after the current ID in the users table field. See below
- Username: The username that you will use to log in to your WordPress site.
- Pass: Make it secure
- Nicename: the URL friendly version of your name or username
- Email: Your email address.
- URL: Your website URL
- Display Name: Your name, as you would like it displayed in your profile.
Getting the ID
The ID number you can get by accessing the wp_users table in phpMyAdmin and seeing what the IDs lead up to. They generally go up from 1 to the number of users in the site. Find the highest number and then add 1 to get the ID you need to use.
The ID is just the table row number. You simply need to make sure it is higher than any other numbers. If you are unsure then you can just use a really high number like 1000. If there is over 1000 users in your database then you will need to increase this until it is high enough.
The above SQL code must be updated to your own information before you execute it.
There are 2 SQL queries. For each of the VALUE fields, the information needs to be updated.
For the first query, update the values to:
- ‘100’ to the number of the ID you will be using
- ‘Web3’ to the username,
- the ‘password’ part of MD5(‘password’) to the password that you have created. MD5() needs to be kept to ensure it is kept encrypted.
- ‘web3’ is the nicename. Make sure it is URL friendly. i.e. it only uses alphanumeric characters and no spaces.
- ‘hello@example.com’ is your email address
- ‘https://web3.com’ is your websites URL
- ‘2018–03–17 00:00:00’ is the date. You can just leave it as is or update it if you really want.
- ‘Web3’ is the display name your username will have on the site.
For the second query, update the the two 100 values to the same number that you set in the first query VALUEs
You will also need to update each of the queries “wp_database” to the name of your database and the wp_users and wp_usermeta values to the correct table names in your database if they are using a different prefix for them.
Once all of the snippets are populated with your own information, you can execute the Query.
Executing the Query
- Go to the base level of phpMyAdmin. This means you should not have any database selected.
- Click on the SQL tab and paste in the updated queries from above.
- Click the Go button to execute the queries and insert the new user into the database.
The new user will be inserted into the database and you can log into your WordPress back-end using the logins that you inserted. If you did not make note of your password then you can always just update it using the update user method above. You wont need to create a new user.
If there is an error due to the user ID, you may have to change the value from to something higher. In the script it is set to a conservative number of 100 by you should update the value to the next number in the users sequence.
Conclusion
This guide walked you through how to update a users password using phpMyAdmin in your database. It also showed you step by step how to insert a completely new user into your site.
Once you have completed either of these methods, you should then be able to log into your WordPress website using the standard login methods.
Did this tutorial save you? Let us know in the comments. If you have more questions relating to manipulating your data in the database or have some tips of your own then please also share them in the comments.