You’ve probably heard of the social media giant Instagram. It is only one of the biggest social media platforms on the web today.
In this article we will show you a number of ways to instantly push your Instagram feed to your website automatically.
Instagram is a social media platform for influencers and consumers and is a great way to drive traffic to your website. Although social media platforms like Instagram are useful in business, they can take a lot of time to utilize. That is why it is a good thing that Instagram has the ability for you to automate interactivity between your Instagram account and website.
Instagram is a platform that allows you to discover new users accounts or interests based on what you already like. Your profile can be discovered from a keyword that you include with your post (a hashtag) or from your location or what your friends recommend.
According to statista, Instagram has grown to over 700 million by the end of 2017 and it is not slowing down.

No matter whether you have a strong Instagram following or not, you will likely want to share you latest Instagram posts to help build your brand and continue with pushing future user engagement back to your site.
Instagram helps keep your audience engaged and is also a way to help continue selling after they leave your website.
We will be showing you 3 ways to get your social media feed to your website. The three ways we will be showing are:
- Using an Instagram WordPress plugin to pull the latest posts from your Instagram feed.
- Using IFTTT to create a post on your website when you post on Instagram.
- Manually creating an Instagram feed using PHP code in your theme.
Method 1: Using an Instagram WordPress plugin on your WordPress website
This is by far the simplest method to adding your Instagram feed to your website.
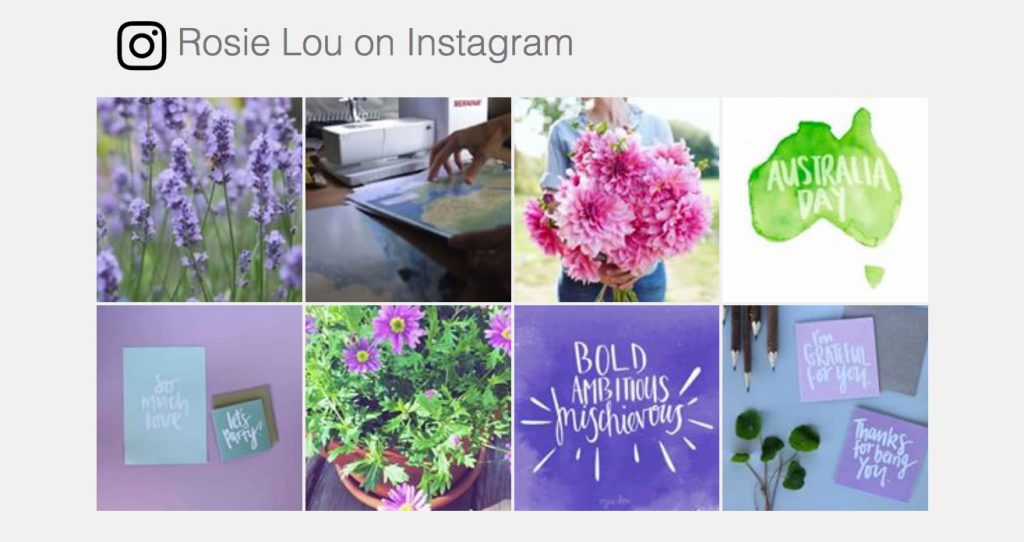
This way will allow you to simply display your latest Instagram posts using a shortcode or widget on your website. You do not need to create any posts or any additional data on your website, the images will be pulled from your Instagram feed and displayed. Each time a new image is uploaded, it will be displayed in place of another.

You will need to install an Instagram feed plugin. There are many to choose from on the WordPress plugin directory but for this tutorial, we will be using the most popular one aptly called Instagram feed.
-
Install the plugin
log into your WordPress website and go to the plugins menu. Search for the Instagram feed plugin or download the pro version here and activate it.
View our plugin install tutorial for further details on how to install a WordPress plugin on your website.
-
Configure Instagram Feed
Go to Instagram Feed in the admin sidebar menu to access the plugins settings.Click on the Log in and get my Access Token and User ID button to make the connection between your Instagram account and the plugin in your WordPress website.
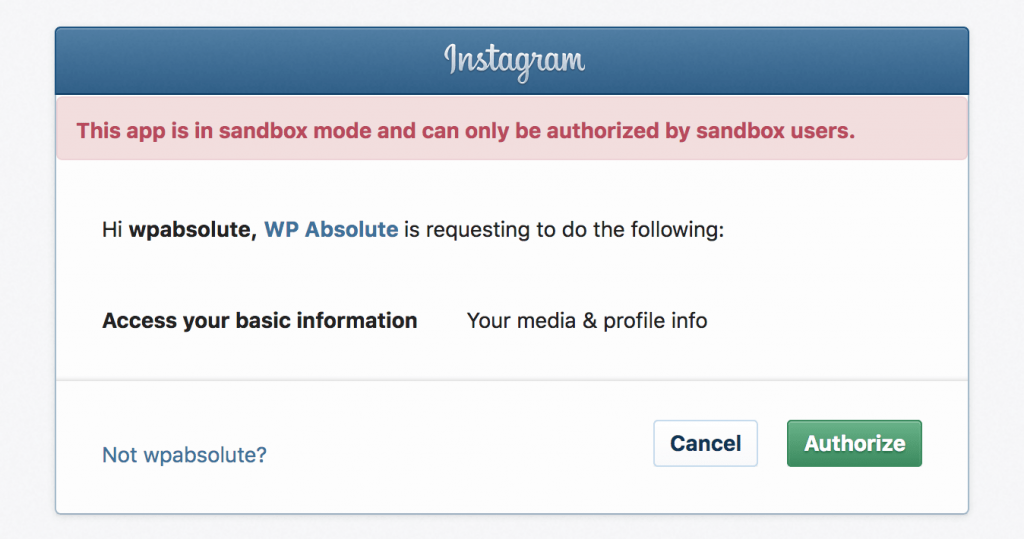
A new page will open asking you to Authorize access to your account. Click the Authorize button to proceed.
The page will return back to the Instagram Feed page and will have pre-filled your Access token and User ID in the fields. Your account is now connected and ready to configure your feed.
-
Configure your Feed Settings
Scroll down to the Show Photos From section and enter your User ID from the field above. Click the save changes button to save your user ID. You can also retrieve posts from other accounts. But you will need to retrieve their id first.
-
Customize Feed
Click on the Customize tab if you wish to configure the look and feel of your Instagram Feed on your site. There are dozens of options that let you change the layout, number of photos, header, load more button among other things. Once you are done, click the save changes button to save your customizations.
-
Display your feed
You can display your feed by adding the [instagram-feed] shortcode to any page/post or widget area.The shortcode allows you to make a couple of modifications to the layout by setting the number of items to display and how many columns to the items should span across the page. You can apply these option like like so [code type=”markup”][instagram-feed num=”9″ cols=”3″][/code]
If you would like to display more than one set of instagram profiles photos then you can do so by adding their id’s as the id=”” attribute in the shortcode. For example [code type=”markup”][instagram-feed id=”123456789, 0987654321″][/code]
There are a lot of options you can choose from to configure your shortcodes feed. Look at the Display your Feed tab in the Instagram Feed settings to see all the options.
If you would like to be able to have finer control of the features in your shortcode then you can upgrade to the pro version here.
Your site will now be displaying all of your newest Instagram photos automatically. This option should have been the most straightforward way to automatically display Instagram posts on your website.
If you are a little bit tech-savvy and would like to control the output of your feed then you can do so by following method 3 below. We will be coding a custom shortcode to display your Instagram feed anywhere on your site.
Method 2: Creating a new website post when an Instagram post is created
This method is for people who want to automatically create a post on your website whenever an image is posted on your Instagram account. The post will be populated with the same content you post on Instagram.
We will be using the third party app called IF This Then That (IFTTT) to do the heavy lifting for us.
-
Sign up to IFTTT
Go to IFTTT and log in or create an account. IFTTT is the tool that we will be using to connect Instagram and WordPress together. -
Connect Instagram and WordPress
Once you have signed up and logged in, the first step you will need to do is connect to both your Instagram and WordPress accounts.
To connect to each service you can go to the services page or because we know what services you want to link up, you can click on the Instagram link and WordPress link to take you there directly. On each of these pages you will need to click on the “reconnect” button to create the link. Follow each step to link your two accounts. -
Create a new applet
Go to the My Applets page and click on the New Applet button. -
Create the “this” link
Click on the +this link to create the Instagram connection. Use the search field to search for Instagram. Once it shows up, select the Instagram App option. -
Choose your Instagram trigger
Once you are back on the main IFTTT window, you have several different options to choose from that will affect when the automation is run.You can choose to have it run:
- on every new photo or video you upload.
- only when a photo or video is uploaded with a specific hashtag.
- only when a photo is uploaded from a specific location.
We will be selecting the first option which is triggered when any new photo is uploaded.
-
Create the “that” link
Click on the +that link to create the WordPress connection. Use the search field to search for “WordPress”. Once it shows up, select the WordPress App option. -
Complete action fields
This step involves creating the skeleton of what IFTTT will create on your website. The fields come pre-filled with the necessary information and you can tweak it to however you would like.You can add a title, body, tags and categories and you can also choose whether you want to publish the post immediately or if you would prefer to create a draft so you can publish it at a later date.
By clicking on the Add ingredient button under each field, you can prefill the field with dynamic content such as the URL or the embed code.
Once you have filled in the fields to your liking, you can click the Create Action button to proceed to the next step.
-
Review and Finish
This step you can review what you have created and give it another description if desired. If you would like, you can also choose to receive notifications when the applet runs.Once ready, Click the Finish button to create the Applet.
If you successfully linked both your Instagram and WordPress accounts and setup the Applet then your automation is now complete.
Post an image on Instagram to see your newly created post automatically get created on your website.
If you set the post to automatically get published then it should now be published on your site.
Method 3: Manually coding an Instagram feed shortcode
There may be a time when you need to customize the layout of your Instagram feed further than what is available from a plugin or you just want to get your hands dirty.
This option is a completely manual process that we will be custom coding using PHP as a plugin for our website.
Because we control the entire process, the output can be coded to exactly fit our website layout and design.
This will be a very simple plugin to demonstrate how simple it is to retrieve posts from your Instagram feed.
[highlight type=”note”]You an download the complete file to work along with in our downloads section.
[purchase_link id=”1000″ style=”button” color=”inherit” text=”Download Instagram Feed Plugin” direct=”true”][/highlight]
-
Create a plugin
Open up your favorite code/text editor and begin your custom Instagram feed plugin by adding the plugins header to the top of the page.
[code type=”php”][/code]
-
Add the function to retrieve Instagram posts
[code type=”php”]/* Instagram feed function to retrieve your instagram posts
*******************************************************************************/
function wpabsolute_instagram_feed( $count = 8 ) {// Update to your desired frequency. The longer time to cache the better on performance
$cache_time = 72; // Hours (3 days)// Access token required to connect to Instagram API and feed to work.
// Retrieve yours here: https://www.instagram.com/developer/authentication/
// Yeah its not very straightforward but once its done you dont need to do it again
$access_token = ”; // Add you Instagram API token here// Check if transient is not set, otherwise use our transient from database
$feed = ”;
if ( false === ( $feed = get_transient( ‘wpab_instagram_feed’ ) ) ) {
$url = ‘https://api.instagram.com/v1/users/self/media/recent/’;
$url .= ‘?count=’ . $count . ‘&access_token=’ . $access_token;// Attempt to get access to the instagram API
$response = wp_remote_get( $url );// Did we got a valid response from Instagram?
if( $response ) {// Decode the body of the response for use
$body = json_decode( $response[‘body’] );
$feed = $body->data;// Cache the response in your database so that you
set_transient( ‘wpab_instagram_feed’, $feed, $cache_time * ‘HOURS_IN_SECONDS’ );
}
}
return $feed;
}[/code]
This function accepts one variable of $count which allows you to set the number posts to retrieve from Instagram.You will need to also update the $access_token variable with your own Instagram access token (see next step).
The function pulls the data from your Instagram profile and stores it in what WordPress calls a ‘transient’. A transient is a useful feature to temporarily store data in your database for a limited time before it getting removed.
This is useful in cases where we do not want to be attempting to retrieve the same content each time the page loads. Instagram and other API providers may limit the number of times you can access their API so will want to make sure you use a transient to cache the content. Its far better for performance if you do use a transient especially when you start to get a lot of traffic to your website each day.
-
Instagram Access Token
In the previous step we added a variable to our function for our Instagram API access token. In this step we will be walking through creating it.To access Instagram’s API you need to setup an access token. Information about this can be seen in the Instagram developer docs. This is how we do it:
Log in to Instagram in your browser (if you haven’t already) and go to Manage Clients.
If you are not yet signed up as a developer then you will be asked to do so.
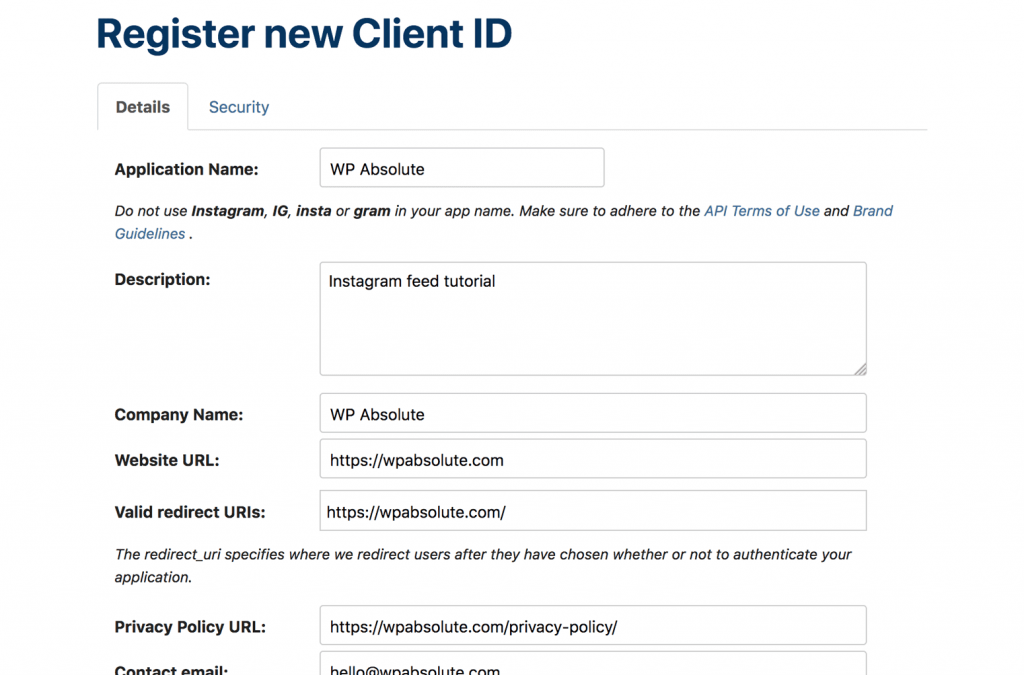
Once you are signed up and logged in, Click on “Register a New Client” in top right corner.Fill out the Register new Client ID form and click register.

Take note of your redirect URL (usually your sites homepage address) as we will be using it in the next step.
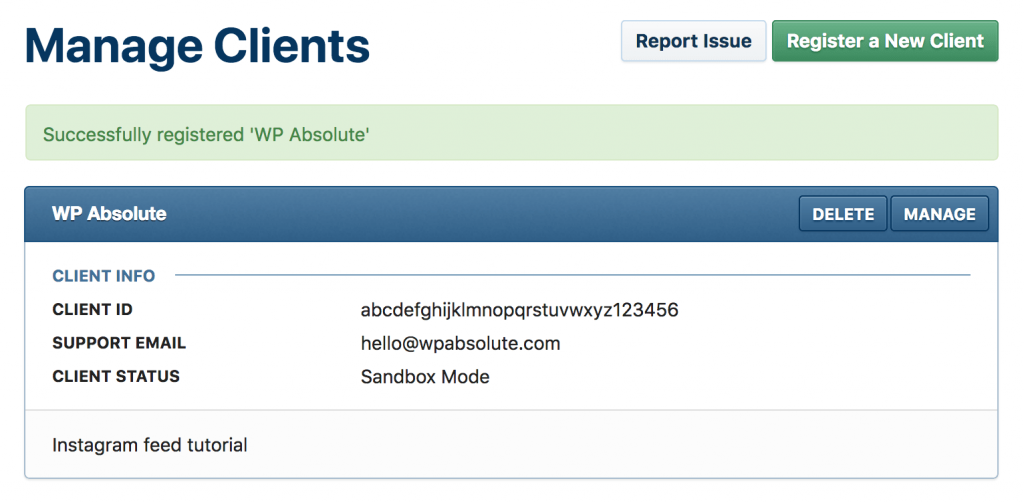
On the next page your will receive your new client id.
Copy that client ID and paste it into the “CLIENT-ID” part of the following URL.
You will need to also replace the REDIRECT-URI to the URL you set in the previous step. I set the URL to be the homepage. https://web3.com.au. Yours will be your website.[code type=”markup”]https://www.instagram.com/oauth/authorize/?client_id=CLIENT-ID&redirect_uri=REDIRECT-URI&response_type=code[/code]
The final URL you need to copy to your browser should look similar to the following with the client id and redirect URI filled out:
[code type=”markup”]https://www.instagram.com/oauth/authorize/?client_id=abcdefghijklmnopqrstuvwxyz123456&redirect_uri=https://web3.com.au&response_type=code[/code]
The new window will ask you to authorize your Instagram account with your website. Click Authorize to proceed.
If you are now redirected to your website then your authorization is complete. Your URL should look something like:
[code type=”markup”]https://web3.com.au/?code=1234567890zyxwvutsrqponmlkjihgfedcba[/code]
The code=xxx part is what you need. Copy just the code (the bit after the equals sign). We will need it in the next step.The next part requires you to run a cURL command. If you are on Mac, you can use terminal and there are a number of programs available for download on Windows.
The following code is what you will be executing. Make sure you update the CLIENT_ID, AUTHORIZATION_REDIRECT_URI and CODE parts using the information you received previously.
[code type=”markup”]curl -F ‘client_id=CLIENT_ID’ \
-F ‘client_secret=CLIENT_SECRET’ \
-F ‘grant_type=authorization_code’ \
-F ‘redirect_uri=AUTHORIZATION_REDIRECT_URI’ \
-F ‘code=CODE’ \
https://api.instagram.com/oauth/access_token[/code]
Run the code and it should output something like the following:
It is a very arduous task to retrieve your Instagram Access token but finally you should have it. Copy your access token to your Instagram feeds function.
Once your access key is in, you will be able to use the function to pull recent posts from your feed. The next step wraps the code in an easy to use shortcode.
-
Create the Instagram feed shortcode
This step we will be incorporating the function that we just made and make it into a simple shortcode so it can be placed in any post, page or widget area.[code type=”php”]function wpabsolute_instagram_shortcode( $atts, $content = null ) {
$a = shortcode_atts( array(
‘count’ => 8 // How many images to display
), $atts );// Get the Instagram feed from our function above
$result = wpabsolute_instagram_feed( $a[‘count’] );// Set the default return value of and empty string
$return = ”;
if ( $result ) {// Loop through the results and build up the markup to return.
foreach ( $result as $insta ):// Modify this markup to your liking
$return = ‘images->standard_resolution->url ) . ‘” class=”col-3’ . $class . ‘” rel=”noopener”>’;
$return .= ‘images->thumbnail->url ) . ‘” alt=”” width=”150″ height=”150″ />’;
$return .= ‘‘;endforeach;
}// Return the instagram feed.
return $return;
}
add_shortcode( ‘wpab_instagram_feed’, ‘wpabsolute_instagram_shortcode’ );[/code]
This function creates a shortcode using the WordPress shortcode API. You can use this shortcode with the following code:
[code type=”markup”][wpab_instagram_feed count=”10″][/code]
It has one optional attribute of “count” which you can change to match how many posts you want to show.The shortcode function is a simple loop that checks if there are any Instagram posts and if so, loops over each one with a link to go to the post. It also displays the post image in thumbnail format.
You can modify the size of the image by changing the images source to one of the following:
[code type=”php”]$insta->images->low_resolution->url
$insta->images->thumbnail->url
$insta->images->standard_resolution->url[/code]
Also, you may want to change the markup to suit your theme in another way. To do so, you simply need to edit the markup within the loop and each image will reflect your changes.
-
Create a simple loop anywhere in your site (optional)
You may not want to utilize the shortcode we created in the previous step. If this is the case then you can easily utilize the function we made to retrieve the Instagram posts and simply run a loop similar to the shortcode.
[code type=”php”]
<a href="images->standard_resolution->url ); ?>” class=”col-3″ rel=”noopener”>
<img src="images->thumbnail->url ); ?>” alt=”” width=”150″ height=”150″ />
[/code]
Make sure to wrap the code in php tags as illustrated and modify as you need to suit your theme.
If you want to see the code assembled into a very simple plugin then you can download it from here:
[purchase_link id=”1000″ style=”link” class=”aligncenter” color=”inherit” text=”Download Instagram Feed Plugin” direct=”true”]
That is all that is required to custom display Instagram posts on your website. As you can see, the final method is a lot more complicated than the previous two methods however it allows you to have complete control over the code that you are using.
The initial process of creating the access token is a long process but once you have your token, it is rather straightforward.
Conclusion
Instagram is a social network that is rapidly growing with hundreds of millions of people using it. Don’t leave your customers unable to find and connect with you.
Using the Instagram feed to connect to your website is a perfect way for customers to connect with you when they are browsing your website.
How did you go creating your Instagram feed on your website? Let us know in the comments below.
If you need a hand with any part of the code, let us know in the comments as well.


Hello, the tutorial is great. however i ran into a problem. i was able to get my access token
i added the code to my child theme’s function file. and then added the shortcode to my page the code wil only display 1 post image.
yes that is correct. If your post has multiple images then the user is encouraged to visit your Instagram feed. Or alternatively, the code can be expanded upon to add multiple images if you know how. I’ll leave that for another tutorial.