Do you need to upload big files in WordPress but get an “exceeds the maximum upload size” error? Good news is you can adjust the settings in WordPress to be able to upload larger files. In this guide we will be showing you how to increase the maximum file upload size to upload files in WordPress.
All website hosting providers are different. That means that the capabilities of your WordPress hosting may be limited. Some budget hosts give you limited resources. Although you cant increase hosting server size yourself, you can adjust the maximum upload file size so larger files can be uploaded.
Some of the biggest themes and plugins available completely exceed the maximum file size upload limits set on WordPress. To get around this you either have to upload the file via an FTP application or you have to increase the limits in WordPress so you can upload the theme, plugin or media file.

This guide will walk you through how to fix these issues but it is not recommended for beginners. You should have an understanding of how to modify files and FTP connect to your hosting server. Beginners might want to ask your hosting provider to complete this operation for you.
It is also important to note that these steps may not work for certain shared hosting providers. If that is the case then again, you should contact your hosting provider to help you increase the maximum upload limit.
There are three separate methods that will increase your maximum file upload size. You will have to try each method to see what option works with your hosting provider.
How to Check Your WordPress Maximum File Upload Size Limit?
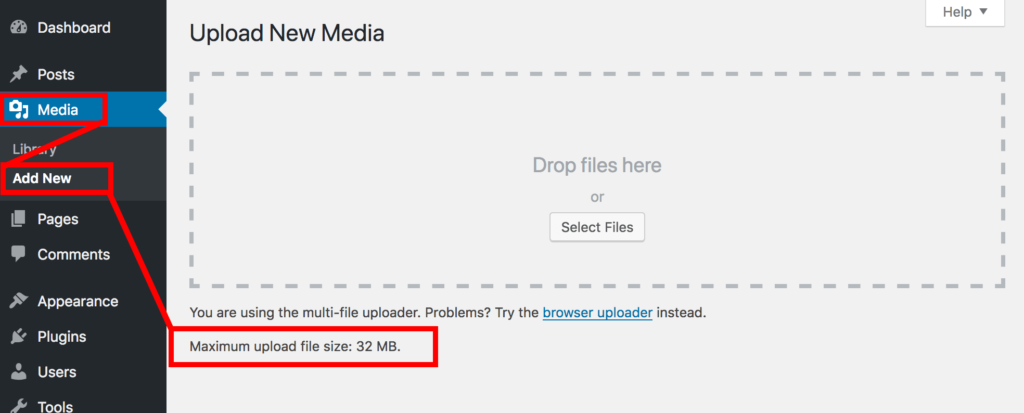
WordPress displays your maximum file upload size in the media upload page. To check your maximum file upload size, simply navigate to Media > Add New in your WordPress admin sidebar.

The maximum file upload size is listed underneath the file upload box.
Method 1. Edit Theme Functions File
The easiest and first method that you can try to increase your file upload size in WordPress is by uploading the following into your child themes functions.php file.
Place the following code on a new line in functions.php making sure it is wrapped inside the <?php ?> tags if not already there.
[code type=”php”]@ini_set( ‘upload_max_size’ , ’64M’ );
@ini_set( ‘post_max_size’, ’64M’);
@ini_set( ‘max_execution_time’, ‘300’ );[/code]
FTP connect into your server or use the Appearance > Editor admin menu to edit your themes functions.php file. Make sure you are making these changes to your child theme so you do not overwrite the changes if you update your theme.
Save your functions.php file and reload your page to see if that worked for you.
Method 2. Edit PHP.INI file
The second method your can try to increase your file upload size in WordPress is to edit your servers PHP.INI file. This method is a little more involved but a lot of users have reported that this method works for them.
Your PHP.INI file is located in the base folder of your hosting server.
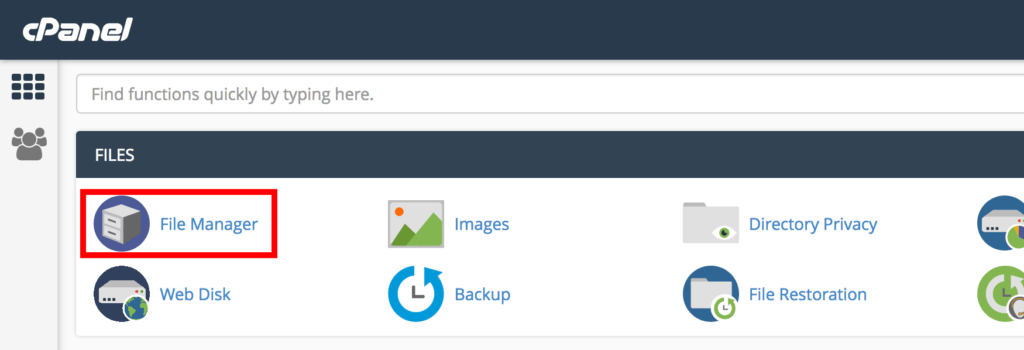
Access your root folder by either FTP connecting to your hosting server or logging into your cPanel dashboard and accessing the file manager area.

If you are on a shared hosting server then you will likely not see any PHP.ini file in the root directory of your hosting server. If there is a php.ini file then open it in a file editor. If you do not have a php.ini file then you can create a new php.ini file and open it in the editor.
Paste the following code into your php.ini file:
[code type=”php”]upload_max_filesize = 64M
post_max_size = 64M
max_execution_time = 300[/code]
[highlight type=”note”]If you already have a php.ini file, make sure the above lines do not already exist. If they do then you can just update their values.[/highlight]
Method 3. Edit .htaccess file
The third method you can try to increase your file upload size in WordPress is to edit your .htaccess file. This method is similar to method two where we will be editing a file in the root directory of your hosting server. The .htaccess file is located in the root directory.
[highlight type=”tip”]Because it is a dot file, some file managers and FTP applications may not display this file by default. Make sure you configure the options to display hidden dot files if you can not see the .htaccess file in the root of your directory.[/highlight]
FTP connect into your hosting server or use your cPanels file manager to navigate to the root directory.

Open up the existing or create a new .htaccess file if it doesn’t exist and add the following code:
[code type=”php”]php_value upload_max_filesize 64M
php_value post_max_size 64M
php_value max_execution_time 300
php_value max_input_time 300[/code]
Save the file and upload it back onto your server in the root directory.
Conclusion
If any of the above methods worked for you then you should now be able to upload larger files in WordPress.
The limit on our hosting showed 32mb files were the limit. We have doubled the limit to 64mb and now we can upload twice the size files.

Note that you should avoid increasing the file size as much as possible as it can cause server errors if you make it too high.
If you need to upload larger files then you may want to consider using a cloud storage service like Amazon Web Services as it is better suited to larger files that a website hosting provider may provide.
If none of these methods worked for you then you have to contact your WordPress hosting company and they should be able to help you. Some hosting providers simply do not allow you to make these sort of changes so they have the right access.
Did this article help you increase your maximum file upload size in your WordPress website? Let us know how you went in the comments below.
Don’t forget to join us on Facebook and and subscribe to our YouTube channel for the latest WordPress tutorials and tips to grow your WordPress website.

