Do you want to install and use WordPress on your local Mac computer? This guide will walk you through how to setup MAMP and install WordPress on your Apple Mac computer.
By creating a local WordPress install on your Mac means you can run WordPress privately without the need to have a hosting server while you play around or develop your site.
No one else can access your MAMP website because it is a server on your own computer. If you wish to publish it online then you need it to be hosted on an external hosting server.
When you are finished working on your site then you can transfer your local install onto a hosting server where everyone can access it.
Installing WordPress on your local Mac is a very similar process to installing WordPress on your hosting server. There may be different underlying software that runs it but it is still the same WordPress. The software in this case that we will be using is MAMP.

What is MAMP?
MAMP is a simple and easy application that you install on your Mac computer that allows you to setup and run a virtual hosting server on your computer. This means that you can run WordPress and other similar web applications directly on your computer.
MAMP is an acronym that stands for:
- macOS (Your computers operating system)
- Apache (the server software)
- MySQL (the database management system) and
- PHP (the programming language).
Most people will run MAMP on their Mac so they can quickly and easily develop their application or WordPress website without needing to continually upload to a server to see their changes.
WordPress requires a server, database and PHP software to run on so MAMP is the perfect solution if you are on Mac.
How to install MAMP on your Mac computer
This section of the guide will walk you through how to install MAMP on your Mac computer. We will be downloading MAMP and then setting it up with the best settings to develop WordPress with.
1. Download MAMP
You need to download the MAMP installer from the MAMP website download page.
You can download just the free version of MAMP or if you need extra features then you can choose to purchase MAMP Pro. You do not need MAMP Pro to run WordPress and we will be using the free version in this tutorial.

Click the Download button to download the MAMP installer.
2. Install MAMP
Once the installer has finished downloading, double click it to install MAMP. Follow the install steps by clicking through the install process.
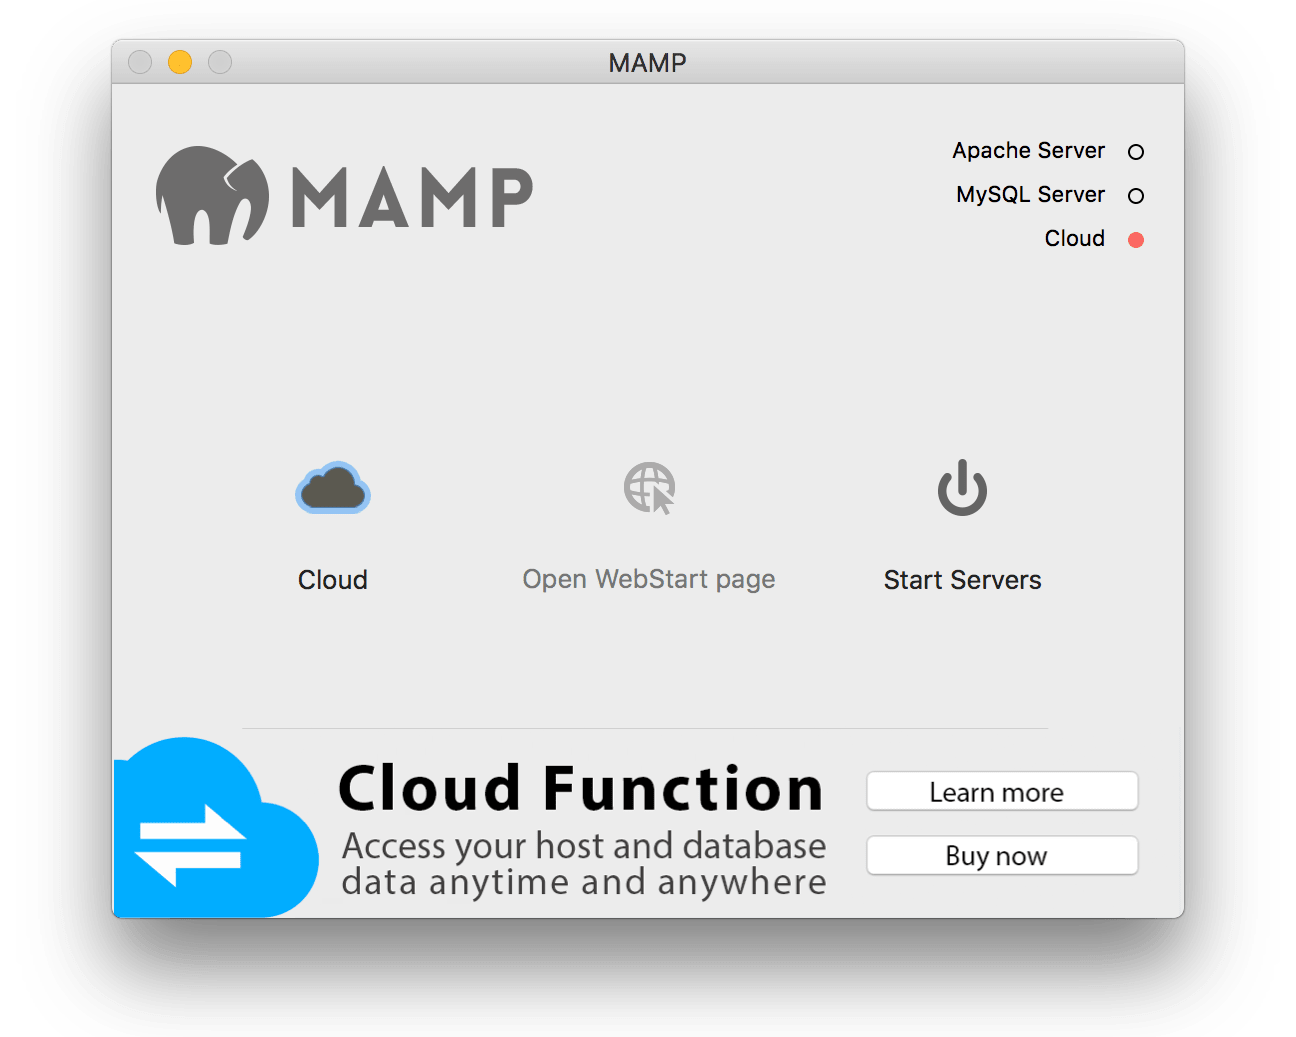
3. Open MAMP
MAMP will be installed in your Applications folder. Go to your applications folder and click on the MAMP application inside the MAMP folder.
Note: If you also installed MAMP Pro then make sure you select the right MAMP application.
4. Configure MAMP
There are not a lot of preferences to configure with MAMP but we recommend you customize them to your own preferences.
You can open preferences by going to the MAMP > Preferences… menu at the top or using the keyboard combination of ⌘, keys at the same time.
Here are a couple of preferences that you might want to consider configuring: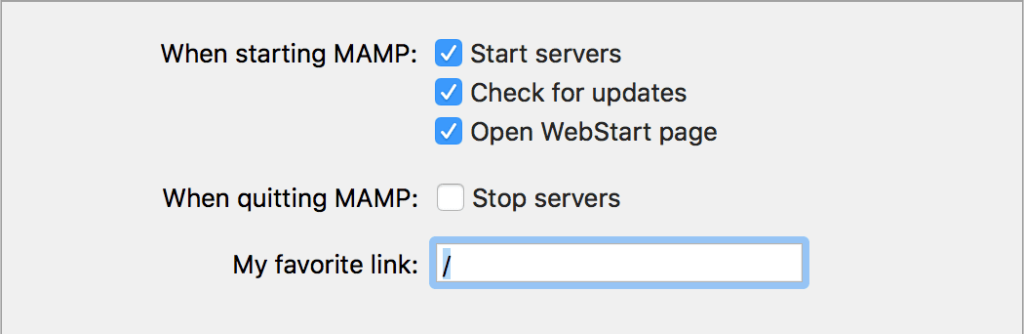
Start/Stop
If you are using MAMP often, then you should tick the Start servers option so you do not have to start it manually.
You do not need to run MAMP if you untick the stop servers when quitting MAMP option. That way you can close MAMP and your local install will still run.
You should set your favorite link to “/” if you have your WordPress website located in the base directory. If your WordPress site is installed in a folder called “web3” then you can set the favorite link to “/web3” and then you will be able to click on the my favorite link to open your WordPress website.
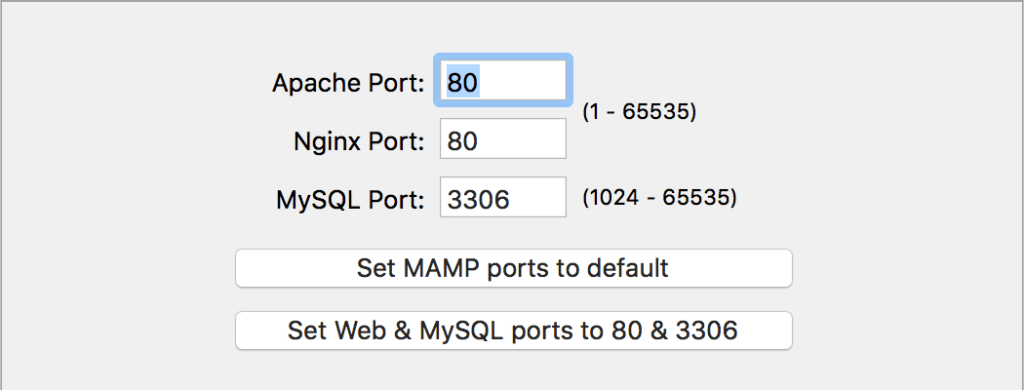
Port
By default, your ports will be 8888 and 8889. If you click the Set Web & MySQL ports to 80 & 3306 then when you access your website, you can use the url http://localhost URL instead of http://localhost:8888 on the end.
The only trade off is that you will need to put in your admin password to start the server when using port 80.
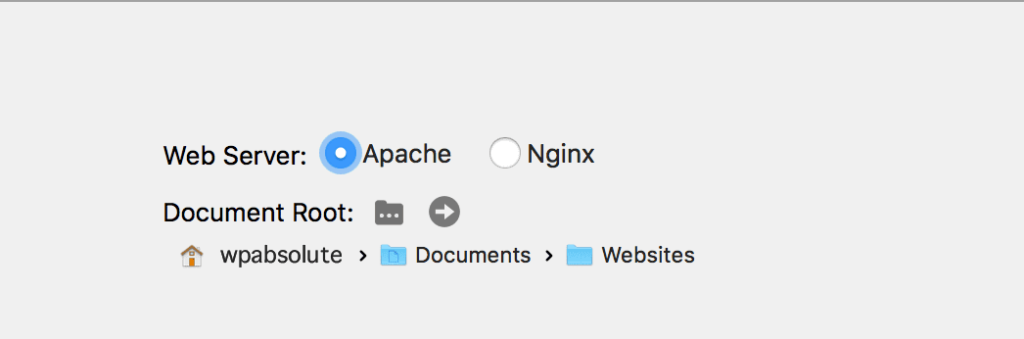
Web-Server
This section allows you to set a custom location to store your WordPress website(s) on your computer. By default it is set to the htdocs folder in the MAMP folder in your applications folder.
This can be annoying if you are accessing the folder often and you do not have a shortcut to the folder somewhere more accessible.
We recommend creating your own website folder inside your documents or similar folder so it is easy navigate to and you wont lose your website if MAMP gets updated or removed. The folder can be named whatever you like e.g. web3.
Click on the folder icon to set a new document root if you desire.
When you are happy with your preferences, click on the OK button to save.
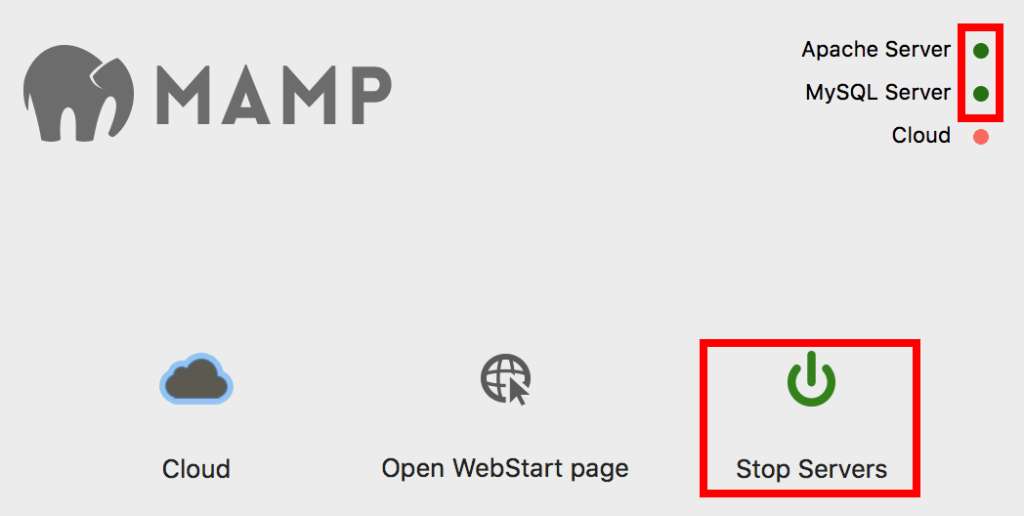
MAMP is now setup and ready to use on your Mac computer. When you have setup WordPress and want to run it, you will need to make sure both your Apache and MySQL server is running. You can start the servers by clicking the Start servers button.
The next step is to download and install WordPress.
Installing WordPress in MAMP
This section of the guide walks you through how to install WordPress with MAMP. You will need to download WordPress and then create a database and configure WordPress.
Lets begin!
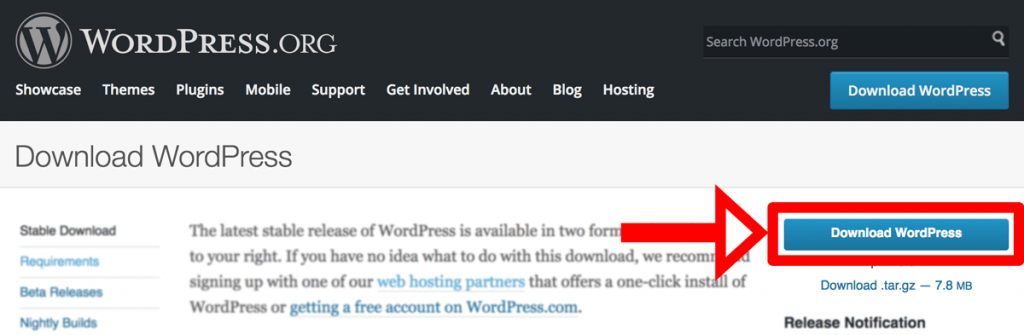
- Download WordPress
Go to WordPress.org and download the latest version as a zip file onto your Mac computer.
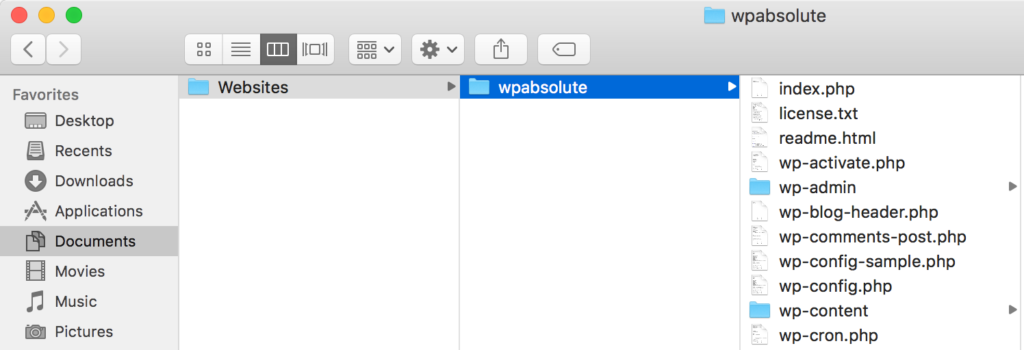
Extract the zip file once it has finished downloading and copy the folder to your root directory that you set in the MAMP preferences. If you did not set any location the copy it to Applications > MAMP folder > htdocs.
2. Access WordPress installer
Now that the WordPress files are installed in the right location then you can begin setting up WordPress.
Navigate to http://localhost/ in your browser.
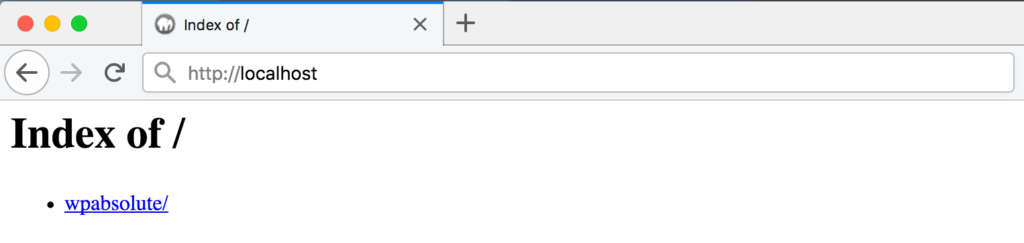
You should see your WordPress folder located there. Navigate through the folder structure until you see the WordPress Install language selector.
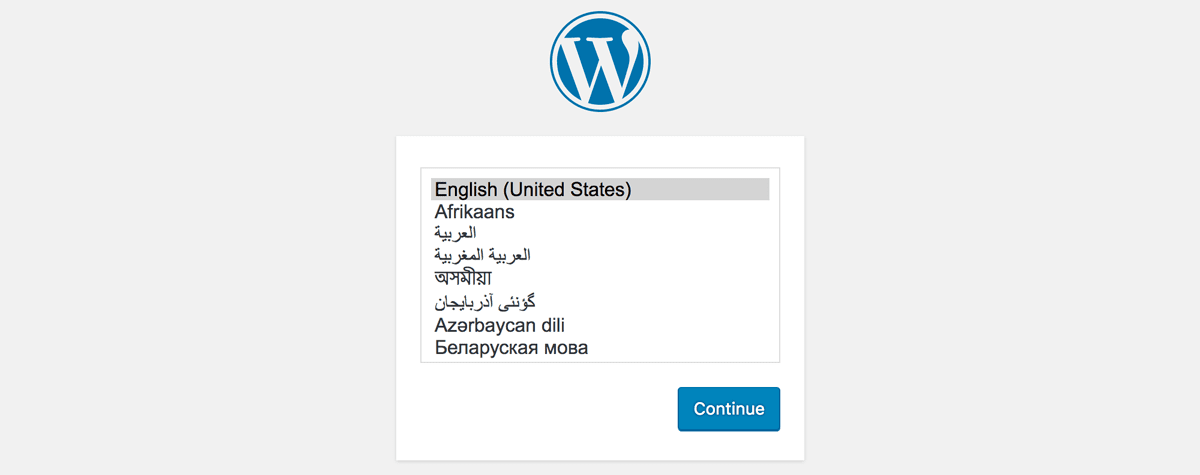
3. Select Language
If your language is anything other than English then you can select it from the list of languages.
Click Continue to proceed to the next step.
4. Let’s Go!
This page is just a welcome page that tells you what to expect in the installer.
Simply click the Let’s Go! button to proceed to the next step.
5. Configure Database
This step requires you to configure your database. If you have not created a database through MAMP then you will need to do that before you can enter the details and proceed.
To create a new database, in a new browser window, navigate to http://localhost/phpMyAdmin/ to access phpMyAdmin. phpMyAdmin is a database management tool that comes on most servers that has mySQL installed on it.
phpMyAdmin allows you to create, edit, update and delete your database.
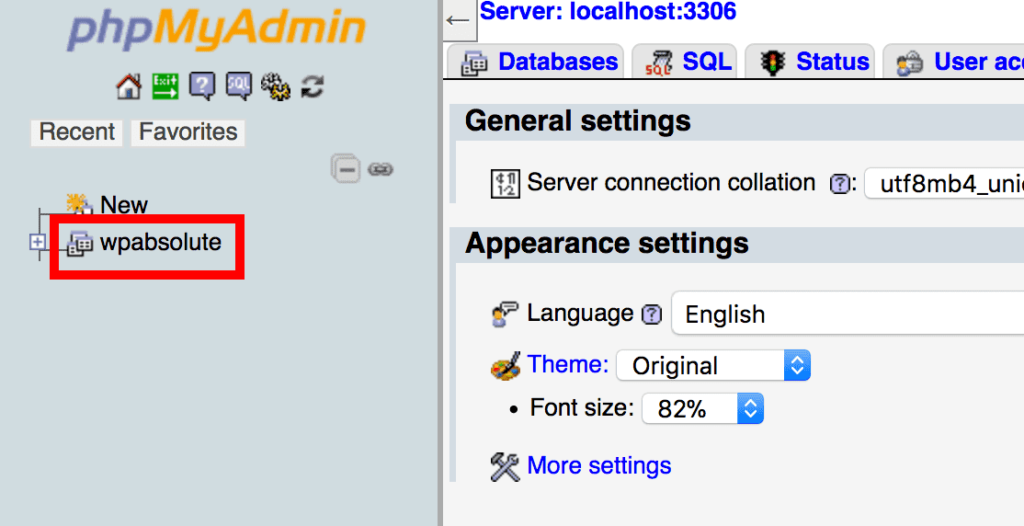
Because you have not yet created the database then we will need to create one. In the left hand sidebar menu you will see a small New button. When clicked it will bring up the new database creation window. Type in a name for your database e.g. “web3” and click the Create button to save your new database.
Take note of the name of your database as you will need to enter it in on the WordPress installer.
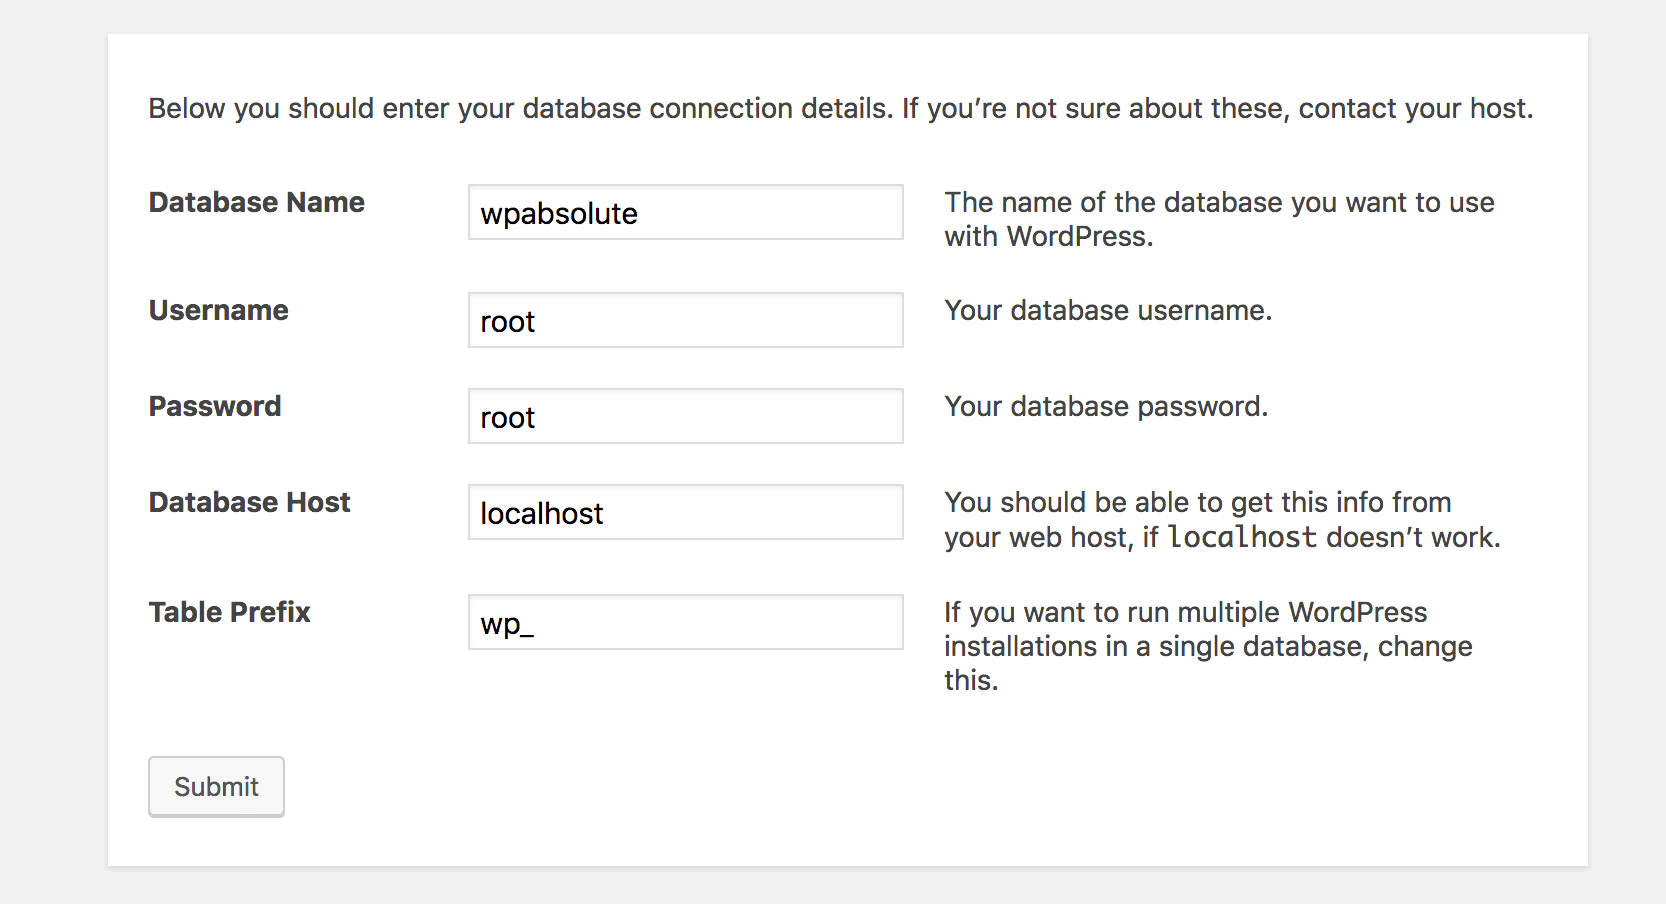
Navigate back to the WordPress installer window in your browser and enter the database name into the database name field.
‘root’ is the default value for both the username and password.
‘localhost’ is the default value for the database host.
You can leave table prefix as ‘wp_’ on your local computer. It is often recommended as a security feature to change the prefix but you can leave that step for on your live server.
Once you have entered all of the database values then click the submit button to proceed to the next step.
6. Run Installation Sparky
The next window will simply say that it has everything needed to run the installation. Click on the Run the Installation button to proceed to the next step.
7. Add Website Information
The Welcome page asks you information about your WordPress site.
Create a title for your site and add your username, password and email address.
You do not need to tick the discourage search engines checkbox as you are developing on your local computer and search engines and other computers will not be able to reach your site anyway.
Once you have filled out the fields, click the Install WordPress button to proceed to the final step.
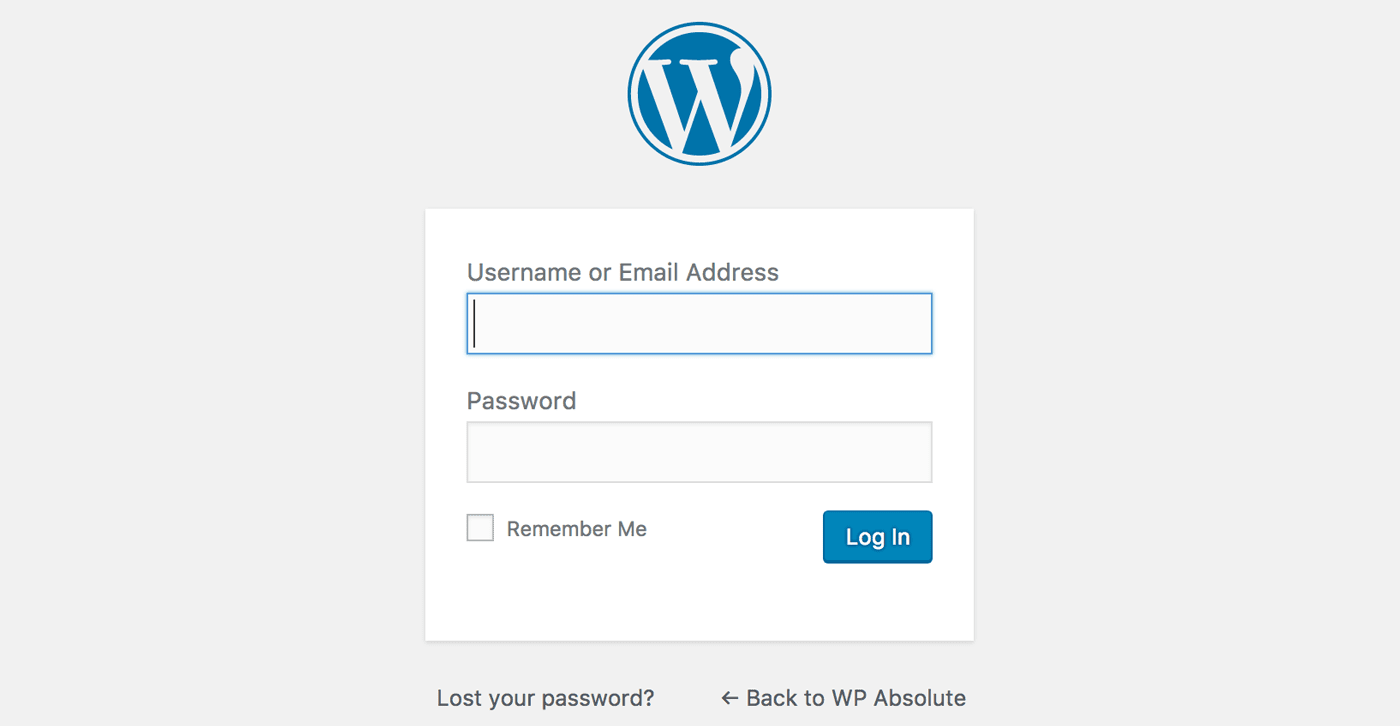
8. Success!
Your WordPress website has now been installed. You can click the Log In button to go to the login page of your new local WordPress site.
WordPress is now successfully installed on your local Mac computer. You can now Run WordPress on your Mac using MAMP just like how you would on any other hosting server.
Using WordPress and MAMP moving forward
Now that you have WordPress installed on MAMP you do not need to install anything else. You can simply use your WordPress website on your local computer.
You access your WordPress website in the browser by going to http://localhost make sure you have started the servers on your MAMP application. If you shut down your computer then you will have to restart the servers again in MAMP to run your WordPress website.
To access the files of your WordPress website, you simply need to either navigate to the new root folder that you created in MAMP or if you left it as default then you need to navigate to
/Applications/MAMP/htdocs to see your WordPress install.
If you wish to create a new WordPress install then you simply need to create a second database in phpMyAdmin and create a new folder next to your other folder in the root document folder with all of the WordPress files in it.
Once you have finished building with WordPress on your local Mac computer then you will likely want to move WordPress to a live hosting server. Follow our migrating WordPress from local to live hosting server guide to help you with the migration.
This guide walks you through how to install WordPress on your Mac computer with MAMP. Let us know in the comments below how helpful it was to you. If you need assistance then also add your comments and we will help you out.