
Forget how to perform a technical SEO audit – it’s SEO is all about content right!? So, you’ve been churning out quality content like there is no tomorrow. You’ve been promoting it like mad on social media. You’ve even been doing link building.
But you’re seeing no increase in the amount of organic traffic coming to your website…
You get frustrated and start shouting from the windows “SEO doesn’t work!”.
Little did you realise that you skipped one important foundational step with your SEO strategy.
That step is: the technical SEO Audit.
You see, you could be producing the greatest content the world has ever seen at a rate that outstrips your competition. All that work could be going to waste if your website contains foundational SEO issues and errors.
In this article, you’ll learn how to perform a technical SEO audit, why they are so important and what are the exact steps to complete one.
Table of contents
- What is a technical SEO audit & why should I care?
- What’s included in an SEO audit & when should I perform one?
- How to perform a technical SEO audit
- Begin by crawling your website
- Check sitemap hierarchical structure
- Review site audit report & priorities issues for fixing
- Check for website duplication
- Run a content duplication audit
- Check for thin & low-value pages
- Check page meta titles, descriptions & on-page optimisations
- Audit internal & external links
- Check backlinks
- Audit website speed & performance
- Check Google Analytics & Search Console
- Conclusion & next steps
- Get your free technical SEO Audit
What is a technical SEO audit & why should I care?
A technical SEO audit is a series of checks done on your website to ensure it has the best chance of ranking well in search engines.
Your website is the foundation of your SEO strategy. Poor website technical SEO compliance will reduce your ability to achieve strong rankings in search. On the flip side, a high-quality website with great technical SEO implementation will amplify the results of your SEO efforts.
That’s why technical SEO audits are an important foundational first step towards a successful SEO campaign.
Technical SEO audits cover areas, such as links, website performance, website structure, content, keywords, domain structure and much, much more.
A good, in-depth technical SEO audit will look at how your website performs against technical factors. An SEO specialist (that knows what they are doing) can interpret the results of the audit and recommend improvements to your SEO strategy.
Technical SEO audits are not a ‘set and forget’ one-time strategy. The search algorithms are always evolving. That’s why you need to continue to audit your website to check how it complies with the latest in SEO best practice. Additionally, your business’s website should be always evolving and changing as your business does. These website changes can introduce new technical SEO issues if left unchecked. That’s why before learning how to perform a technical SEO audit, it’s important to understand that technical auditing is, and should always be, part of your ongoing SEO strategy.
What’s in an SEO audit & when should I perform one?
The following infographic outlines the six core areas that influence how to perform a technical SEO audit.

You should do a technical SEO audit if you’ve never done SEO before. That way, you can plan out what SEO activity needs to be done as part of your SEO strategy.
Once you’ve learnt how to perform a technical SEO audit, you can use tools like Ahrefs or SEMRush to automate ongoing auditing.
We recommend running audits each week on a Sunday so come Monday, you’ll know what technical SEO work needs to be completed for the week.
The most important thing to remember here is that technical SEO audits are not ‘set-and-forget’.
If you want to win with SEO, you need to be continually auditing and fixing any SEO issues that arise as time goes on.
How to perform a technical SEO audit
Here are the exact steps (in order) on how to perform a comprehensive technical SEO audit.
1. Begin by crawling your website
The first step in the technical SEO audit is conducting a website crawl. You can use tools such as Google Search Console, Ahrefs, SEMRush, Spyfu, DeepCrawl or manual Google domain search to do this.
Our preferred way of conducting website crawls is by a combination of Screaming Frog SEO Spider Tool & SEMRush’s Site Audit tool.
Note: If your website has more than 500 pages, you’ll need the premium version of Screaming Frog.
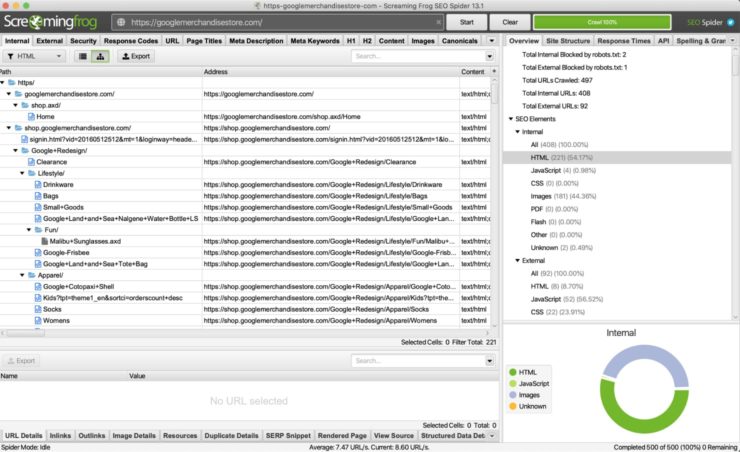
Crawling internal website pages in Screaming Frog
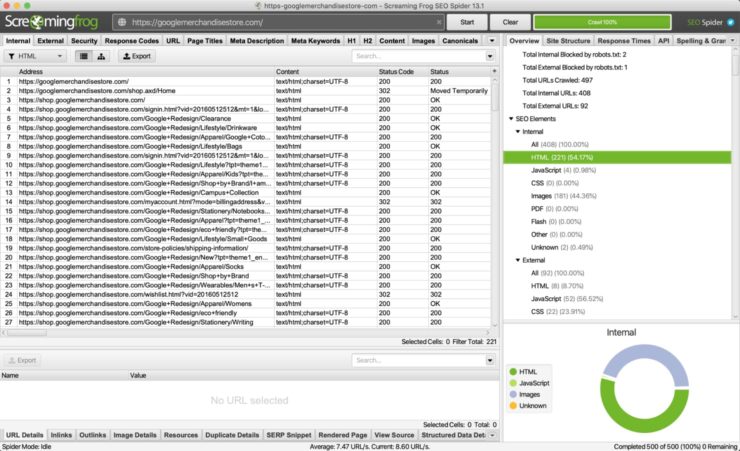
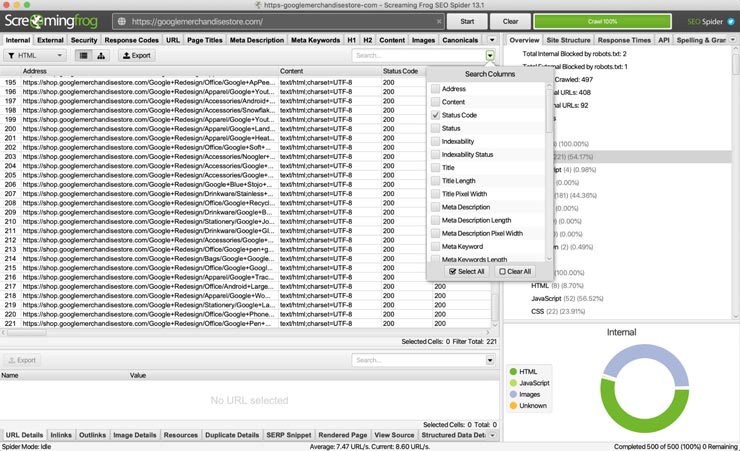
Open Screaming Frog, enter your full website domain name (including HTTP/HTTPS) and hit ‘Start’. Once the crawl is completed, open the HTML view from within SEO Elements > Internal > HTML. This will list our every individual HTML page held within the domain.
If your website pages are coded in JavaScript, see this article on how to crawl JavaScript websites using Screaming Frog.
The next step is to filter out all pages except for your status code 200 pages. Status code 200 means the page is live and operational. To do this, click on the search bar drop-down and checkbox status code. Next, enter ‘200’ into the search box. This will filter the page view to only show live operational pages.
From the internal HTML view, click the export button and download the CSV file. Give this file a meaningful name and store it somewhere for future reference (we’ll be revisiting this file later in the auditing process).
Before moving on, note down the number of individual HTML pages that Screaming Frog has picked up from its crawl.
How to perform a technical SEO audit in SEMRush
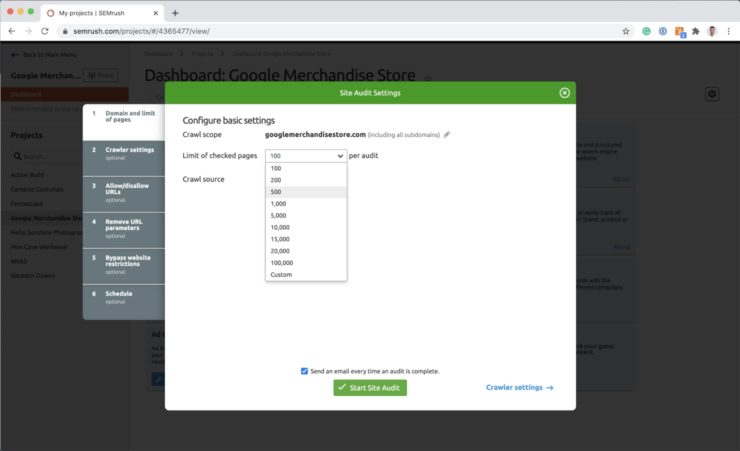
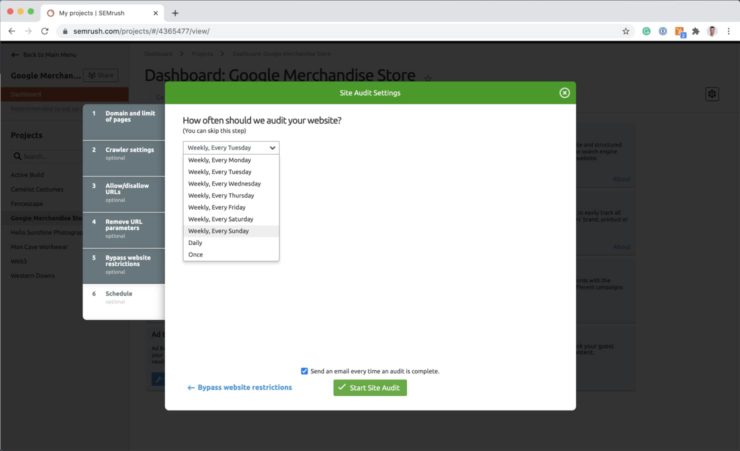
Open SEMRush and go to the Projects section. Create a new project for the domain that you’ll be conducting the technical SEO audit on. Set the crawl page limit to cover the number of individual pages that you noted down from your Screaming Frog crawl.
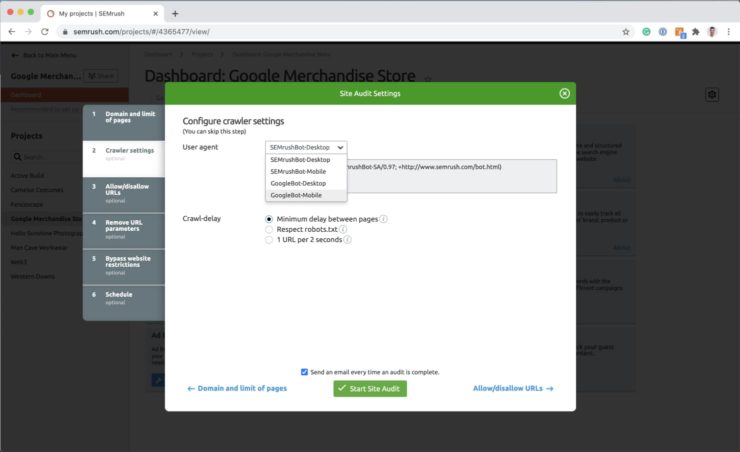
Change the crawler bot to Google Mobile. The reason why we use the Google Mobile crawler bot is so our auditing data is in line with Google’s switch to mobile-first search indexing.
Finally, you can set the audit to repeat either once a week weekly or each day. We set our audits to happen once a week on Sunday so our technical team can review and action the reports first thing on a Monday morning.
With your audit settings confirmed, hit the start audit button and wait for the audit to complete. SEMRush is one of, if not the most, comprehensive site auditing tools on the market with 120+ different SEO audit checks. With that said, it can take some time for the audits to complete depending on the size of your website. So in the meantime, let’s move back onto the next step…
2. Check sitemap hierarchical structure
Time to jump back into Screaming Frog! With the SEO Elements > Internal > HTML view open, click the sitemap button which is located to the left of the Export button.
You should see the list of URLs change to a folder-like layout. This visually shows the sitemap structure of your website.
Take a good look at where your pages sit within the sitemap. Like Marie Kondo’s wardrobe, your web pages should appear in a clean and logical hierarchy. What you shouldn’t see is a bunch of random pages scattered across a bunch of random folders.
For example, let’s say you’re running an eCommerce store. You may see your product pages scattered across random and irrelevant product categories. This would be an example of poor content hierarchy and site structure, which Google doesn’t like.
Another example would be an article-heavy website that has articles placed under the wrong categories. If your sitemap structure is a mess, then Export your sitemap from Screaming Frog and re-do it in Excel until you are sure it makes sense.
Once completed, pass it over to your SEO Specialist for implementation.Oh, and don’t forget to apply the correct 301 redirects when you implement the changes!
3. Review site audit report & prioritise issues for fixing
By now, your SEMRush site audit should be complete. Open the site audit and navigate to the Overview tab.
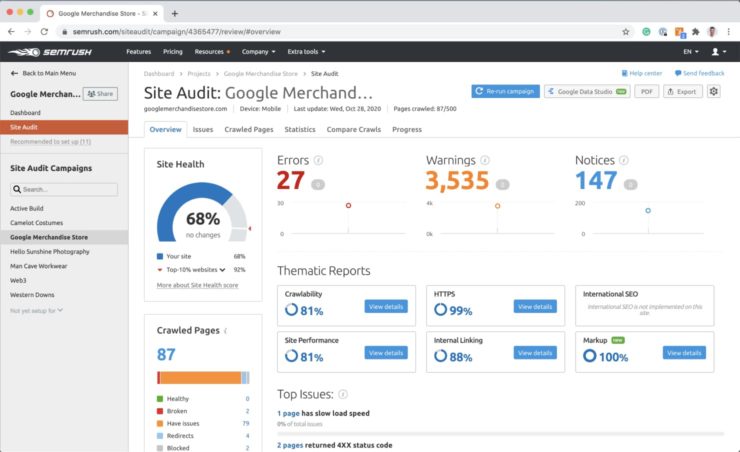
You should see the following reports:
- A site health score percentage indicating how well your website is performing against SEMRush’s 120+ SEO checks.
- A total amount of website Errors, Warnings and Notices. Errors should be checked as prioritised for fixing as soon as possible. Warnings should be reviewed and considered for fixing depending on the SEO value versus the time and cost in applying the fixes. Notices are not always about SEO but can help improve your website’s user-experience.
- Crawled pages display the status of the pages you have elected the Site Audit to crawl when you first set up the site audit.
- Thematic reports offer an overview of your website’s crawlability, HTTPS compliance, performance, internal linking quality & international SEO.
The Top Issues report will prioritise the issues detected on your website by the level of importance and volume of issues detected. This is a good place to get started as you’ll want to fix the issues that will give you the most SEO bang for your buck.
Always double-check the errors, warnings and notices reported in SEMRush before tasking them for fixing. For example, SEMRush may report a broken internal link on one of your webpages. In this case, go to the page on your website and click on the link that SEMRush has reported as broken.
If it is broken, fix it. If it is not, ignore it.
Although the site audit tool is excellent at automating otherwise time-consuming error detection, it can sometimes report false positives. So with that said, always do your due diligence before barking down your SEO specialist’s windpipes!
4. Check for website duplication
Your webpages should use HTTPS and not HTTP. If you are wondering, the “S” in HTTPS stands for ‘secure’, which Google wants all websites to use as the industry standard.
Websites that have been set up wrong may end up having both the HTTP and HTTPS versions of the same website crawled by Google.
This is bad for many reasons. Google hates duplicate content, let alone whole websites that have been duplicated!
Other ways that we’ve seen websites being accidentally duplicated are:
- A website has been moved from one domain to another with the old domain not being redirected to the new one
- Mobile website builders or plugins that have generated a mobile version of the website without proper URL handling
- Accelerated mobile page (AMP) implementations without the correct URL handling
One way to check if your website has been duplicated is by doing a site lookup in Google. Simply type ‘site:yourdomainname.com’ and look at what is returned in the search results.
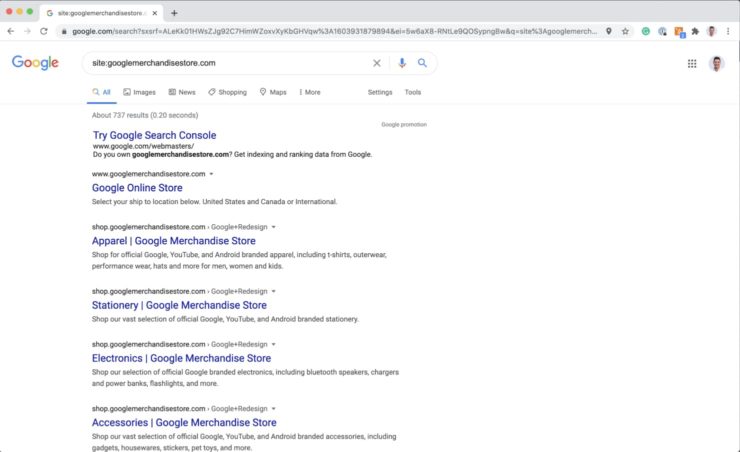
If your web pages have been duplicated, raise this with your SEO Specialist for fixing right away.
5. Run a content duplication audit
Although not as bad as having your entire website duplicated, duplicate page content can also hurt your SEO.
Content duplication can be either:
- large portions of page content that has been duplicated across pages in your website
- content that has been copied and pasted from other websites on the internet
You can use siteliner.com to get a quick overview of how content within your website stacks up against content duplication.
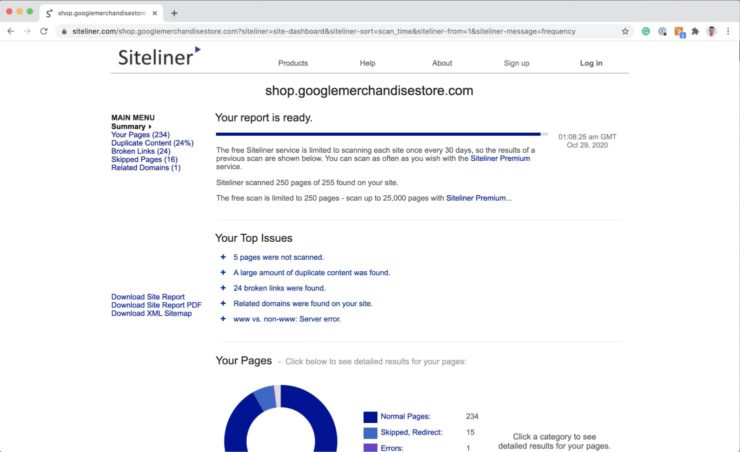
Keep in mind that it is okay to have a bit of duplicate content (less than 30%) on your website. For example, your navigation content could be considered duplicate content as it repeats across many pages.
For most websites, it would make a worse user experience if you removed or tried to make unique navigation content for each page.
To check if any content in your website has been duplicated from other websites, use copyscape.com
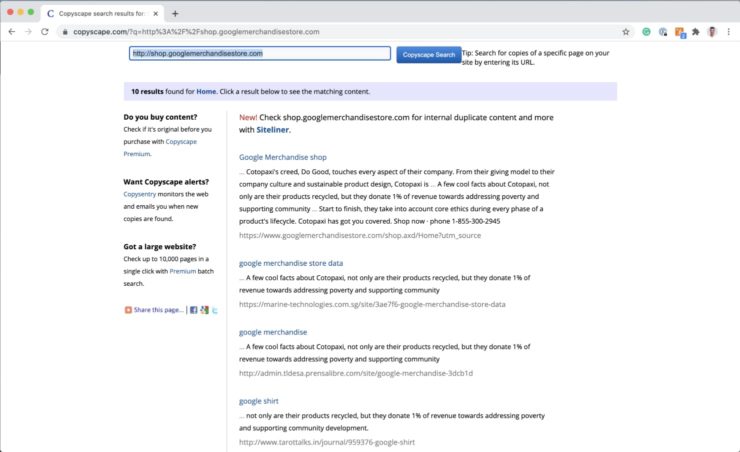
Common examples of duplicated content are eCommerce websites that copy product descriptions from wholesalers. Google hates it when you do this as you are regurgitating content that already exists somewhere else. Thankfully, the fix is simple. All you need to do is rewrite the product descriptions so they are unique enough to not be considered duplications.
6. Check for thin & low-value pages
Just as Google hates duplicate web content, it also hates thin pages that provide little to no value to your audience.
What is a thin page you ask?
Have you ever entered a website where the first thing that loads is a welcome message followed by a button to enter the actual website?
That’s a thin page.
And that’s a big no-no in Google’s eyes.
A quick and simple way to check your website for thin content is with Datayze’s free thin content checker tool.
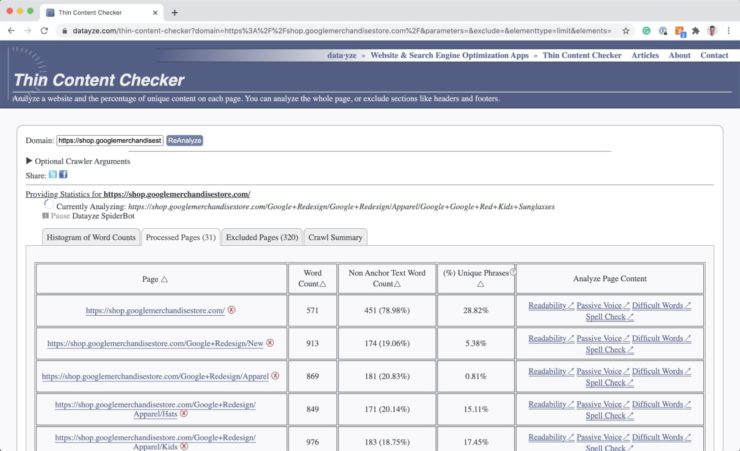
Common examples of thin pages are blog category or tag index pages that do not have any articles index on them. This can happen when the website author changes the category of articles, leaving the original category page bare.
You can fix this issue by either adding quality and unique content to the thin pages so they provide value to your audience.
If the content is no longer relevant and you have no future use for it, delete the page and apply the appropriate 301 redirects.
7. Check page meta titles, descriptions & onpage optimisation
If you’ve never done onsite SEO then you’ve most likely never reviewed or set your website’s meta titles and descriptions. To view what your page meta titles and descriptions are, go back to the CSV file that we exported from Screaming Frog in back in step one.
You’ll be able to see what your page meta titles and descriptions are for each page picked up from your Screaming Frog crawl.
So, what do you do with them?
If you’ve never done onsite SEO, the step before setting your page meta titles and descriptions is keyword and competitor research.
Once you have done this, you can move onto reviewing your page meta titles and descriptions against the following points:
a) Do they contain the keyword that you are targeting?
b) Are the titles accurate and relevant in describing what is on the page?
c) Do they entice interest with the viewer and encourage clicks?
d) Do they fit within the search character limits?
If you’re running a WordPress site, you can use either Yoast SEO or Rank Math to set your page meta titles and descriptions.
Our method of writing page meta titles and descriptions is selecting what pages from the Screaming Frog export need to optimised for a target keyword.
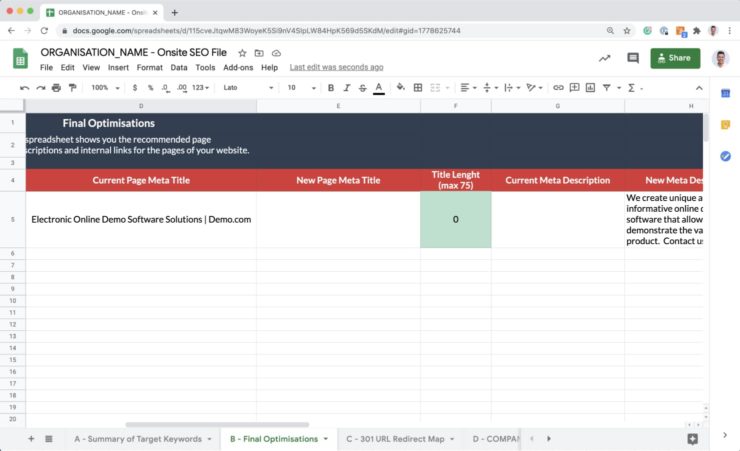
Our method for writing meta titles and descriptions is first copying over the target page rows from the Screaming Fog export. We copy these page URLs into a spreadsheet including their existing meta titles and descriptions. Next, we review the existing meta titles and descriptions and decide if they can be improved.
If the decision is to improve them, we’ll write a new meta title and description next to the current descriptions. Once all meta titles and descriptions are written, we’ll proof them and review them for consistency. Once the client approves, we’ll go ahead and implement them into the website.
Our A-to-Z Checklist for on page SEO
In addition to your page meta titles and descriptions, you’d also want to review your on-page optimisations. In summary, here’s our A-to-Z on on-page optimisations that you should check for on your target pages:
- Is your copy easy enough to read?
- Are you using correct semantic markup & structure?
- Do you reference the target keyword in your H1 page title, subtitle & copy?
- Is your code minified & cached?
- Are you not over-optimising for your target keyword?
- Are your paragraphs short & easy to scan?
- Are you internally linking to other relevant pages?
- Do your links have relevant anchor text?
- Do your images contain relevant ALT text?
- Do your images contain relevant captions?
- Is your copy unique?
- Do you have enough copy for your audience to understand the topic?
- Does your page load in under 3 seconds?
- Are there any errors or usability issues?
- Is your page WCAG & W3C compliant?
- Are you using relevant schema markup?
- Does it function well on mobile devices?
- Is the bounce rate acceptable?
- Is the page crawlable?
- Does your copy contain semantically related keywords?
- Are you not cannibalising another page’s target keyword?
- Are your backlinks relevant & high-quality?
- Is your target keyword referenced in your URL?
- Is your page URL short & easy to understand?
- Is all of your media loaded under HTTPS?
- Is it showing up in sitemap.xml?
And if that wasn’t enough, here’s a few more!
- Does your webpage contain any issues as reported in the search console?
- Are all your website pages referenced in your sitemap.xml file?
- Is your webpage code minified and cached?
Checking and improving your website against all these points listed will ensure your on-site SEO is top-notch.
8. Audit internal & external links
Have you ever found yourself visiting the Wikipedia to read about one thing, only to end up spending hours reading dozens of pages?
One of the reasons why this happens is because Wikipedia has done an excellent job at internal linking.
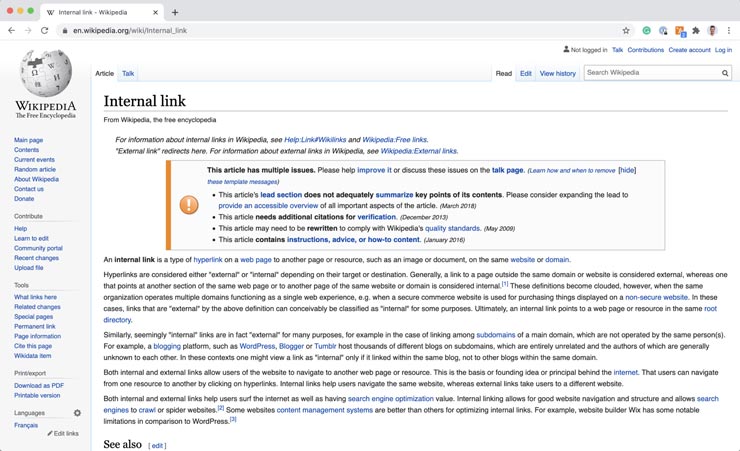
Internal linking means linking other relevant pages in your website with each other where it makes sense to do so.
That way, your audience can ‘fall down the rabbit hole’ as they click on links to other content pages in your website.
This keeps your audience from leaving your site to find information elsewhere. That can translate to an increase in average time spent and a decrease in bounce rate.
As you release new pages and posts on your website, it can be easy to forget to link them with other relevant pages and posts in your site.
That’s why placing internal links where it makes sense to do so can improve your website’s usability, which can help improve your SEO.
But what if you need to link to more information that you do not have a page for in your website?
In that case, you’d want to link to a separate website that is a subject matter expert on the topic you are describing on your webpage.
This is called an external link as you are linking to another webpage that is outside of your domain URL.
Over time, as the websites you’ve externally linked to change, can result in your external links breaking or becoming irrelevant.
That’s why it’s important to check both your internal and external links to ensure they are working as intended.
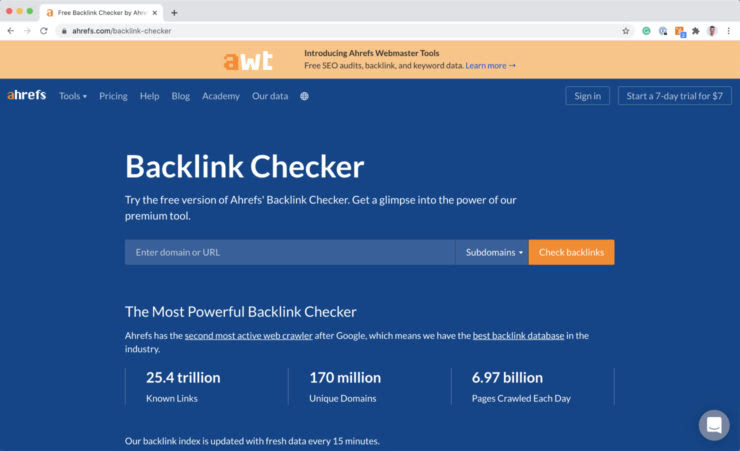
9. Check backlinks
One of the key factors that Google uses to figure out where to rank your websites is backlinks.
Specifically, the number of relevant and quality websites linking to your website.
In general, the more relevant and high-quality websites linking to your own, the more Google likes you.
Google wants to be sending its searchers to the most quality and authoritative websites as possible.
So, if Google sees your website as being authoritative, it will reward you with better rankings.
If you have a large number of low-quality websites where it does not make sense why they would be linking to you, this can hurt your authoritativeness.
Backlink spam is one of those old-school black hat SEO tactics that Google is now actively policing against. We’ve come across a few client websites where dodgy SEOs have flooded their domain with low quality, spammy backlinks.
Google thinks the website is trying to game the system and hits them with a ranking penalty. Or worse, removes the website from Google altogether.
That’s why it’s important to monitor who is linking to your website. Too many bad quality backlinks can hurt your website’ ability to rank, or worse, get your website removed from Google search altogether.
You can use Ahrefs free backlink checker to audit your top 100 backlinks. We use the paid version of Ahrefs to do backlink audits as we’ve found the tool to have the freshest and most accurate backlink database.
10. Audit website speed & performance
You know what else Google hates? Slow websites. So much so that site speed is a Google search ranking factor.
Did you know that over 40% of internet users will abandon a website if it takes more than 3 seconds to load? So it’s not only Google that hates slow websites, but pretty much everyone on the internet. That’s why it’s imperative that your website and web pages load quickly.
There are a few tools you can use to check how fast your website loads.
Our go-to website performance checker tool is GTMetrix. GTMetrix will audit your webpage using both Google PageSpeed and Yahoo! YSlow tools and present you the results of both in an easy to understand report.
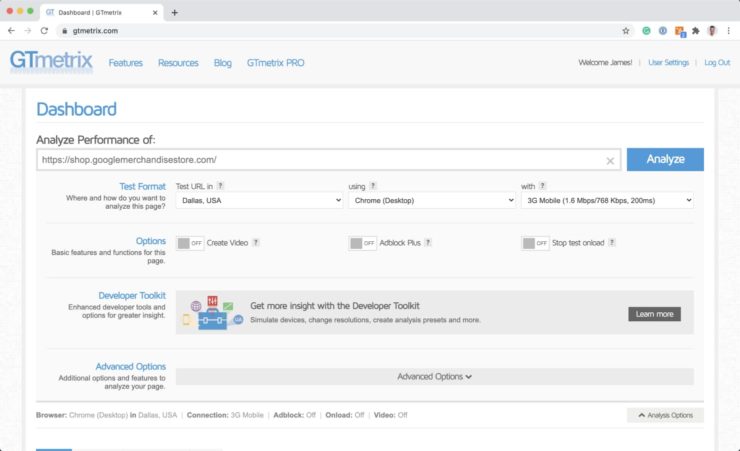
If you create an account, you can test your website by server location, browser & internet connection type.
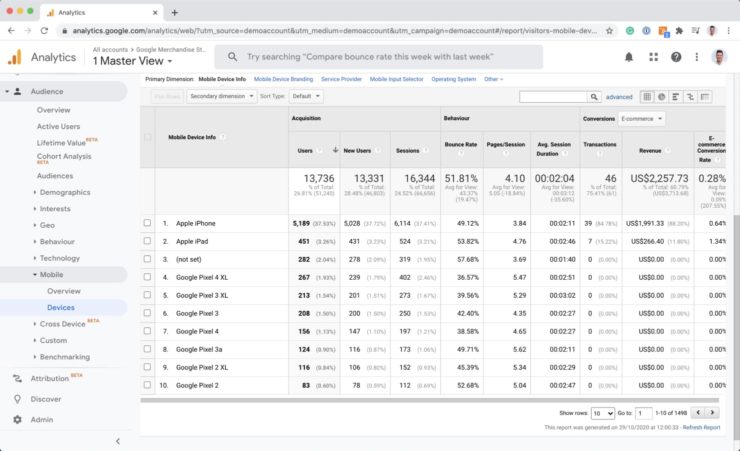
This can help simulate how your website performs for the audience that you are targeting. You can use Google Analytics’s Technology Report & Mobile Devices report to see what types of browsers and devices your audience is using to access your website.
The biggest reason why websites load slow are one of or a combination of the following:
- Large, oversized and uncompressed images including video and (god forbid) audio that auto-plays when the page loads
- Bloated, poorly coded websites that reference too many scripts and load unnecessary features
- Uncached and compressed code files
- Poor webserver quality with slow response times
Your GTMetrix report should be able to flag these issues (and more) if your website has them present. If you do have these issues, download the full report and send it to your web developer for fixing.
11. Check Google Analytics & Search Console
Before diving into Google Analytics, it’s important to check that your website integration code is working correctly.
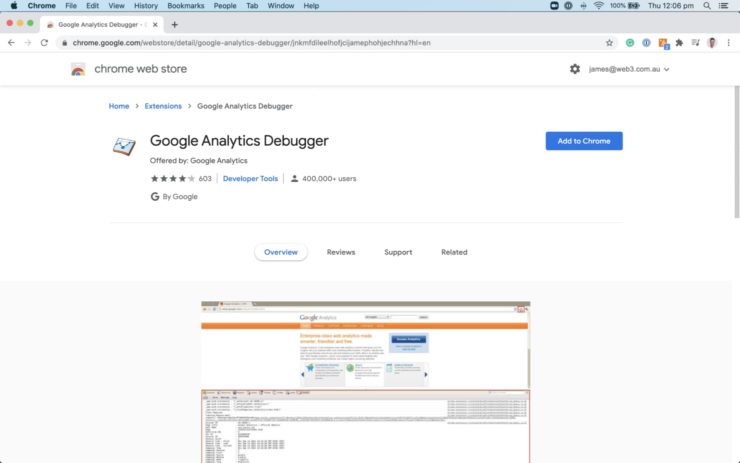
You can use the Google Analytics Debugger Google Chrome extension to check that your code is firing on your website.
If you notice any errors, best consult the Google Analytics troubleshooting guide. Or, get your Analytics Specialist or web developer onto it.
If you are passing Google Analytics into your website via Google Tag Manager, you can use the following tools to check that it is working:
- the Preview Mode from within Google Tag Manager
- the Tag Assistant extension
You should also check that Google Search Console has been implemented correctly and is reading the correct website data.
Three key areas you want to make sure are correct in Google Search console are:
- Making sure that it is reading the HTTPS version of your website (assuming that your website is HTTPS)
- Checking the Index Coverage report is error-free, has the pages you want index validated and the pages you don’t want showing up in search excluded
- Making sure that you have the correct sitemap.xml file indexed under the Sitemap Index report. You also want to check that the structure of your sitemap is correct and the right pages are contained within the right sitemap files
If you come across any issues with these three points, contact your SEO Specialist for further assistance.
Finally, once you’ve confirmed that your Google Analytics account is A-Okay, it’s worth paying a visit to your top organic landing page report.
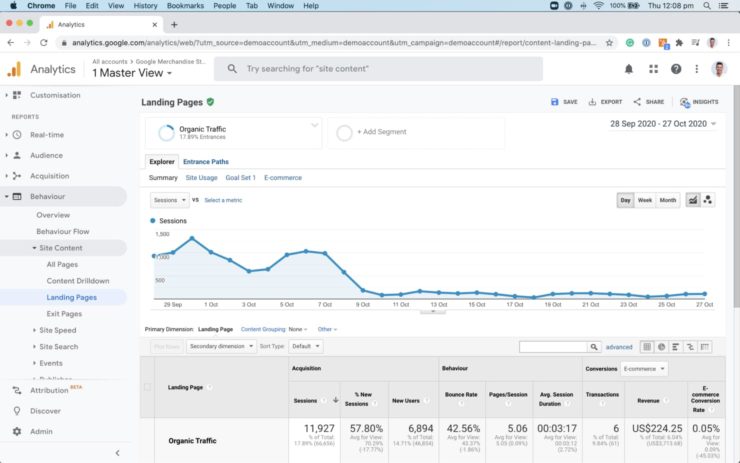
You can do this by opening Behaviour > Site Content > Landing Pages and segmenting the view by Organic Traffic only.
From here, audit your organic search landing pages for Bounce Rate, Pages/Session & Average Session Duration. In general, you’ll want to:
- Decrease bounce rate by making a more user-friendly, engaging page
- Increase pages/session by encouraging the user to click onto a page within your website (see interlinking from step 8.)
- Increase average session duration by creating more engaging pages to encourage your audience to stay on your website longer
By ensuring your Google Analytics & Search Console data is accurate, you can make better decisions on how to improve your SEO. Additionally, you can rest assured that Google is indexing the right data by ensuring your Search Console is error-free.
Conclusion & what to do next
So there you have it! That’s a comprehensive look on how to perform a technical SEO audit for 2022.
As you can see, there’s a significant amount of technical SEO knowledge required to fix the issues raised in the audit correctly.
Once fixed, you also want to make sure that you’ve put the preventative measures in place so they do not happen again. Additionally, you should continue to audit and monitor the overall technical SEO health of your website on an ongoing basis.
Get your free technical SEO audit
At Web3, we’ve been helping businesses succeed with the SEO strategy for over ten years. So, if you’d like us to help you with your SEO, claim your free SEO audit by completing the form below.
Plug in your details now and we’ll have the audit back to you in under and hour.
The first 25 audits will also receive a complimentary 30-minute consultation session with one of our SEO Strategists. We’ll cover the audit together with you, explain what it all means, and outline the steps required to complete it so you can get your website ranking better in Google!
So what are you waiting for? Get started now…